D A V E ' S V O L V O P A G E
|
||||||||||||||||||||||||||||||||||||||||||||||||||
D A V E ' S V O L V O P A G E
|
||||||||||||||||||||||||||||||||||||||||||||||||||

Feel free to email CONTACT |
| 2-Door (Coupe) Kit |
4-Door (Sedan) Kit |
|
| Wagon Kit |
B or C-Pillar for Wagon |
|
| Bulk Lengths |
||
|
||
| 240 OUTER DOOR BLACK VINYL STRIPE KITS Details and Installation Info HERE 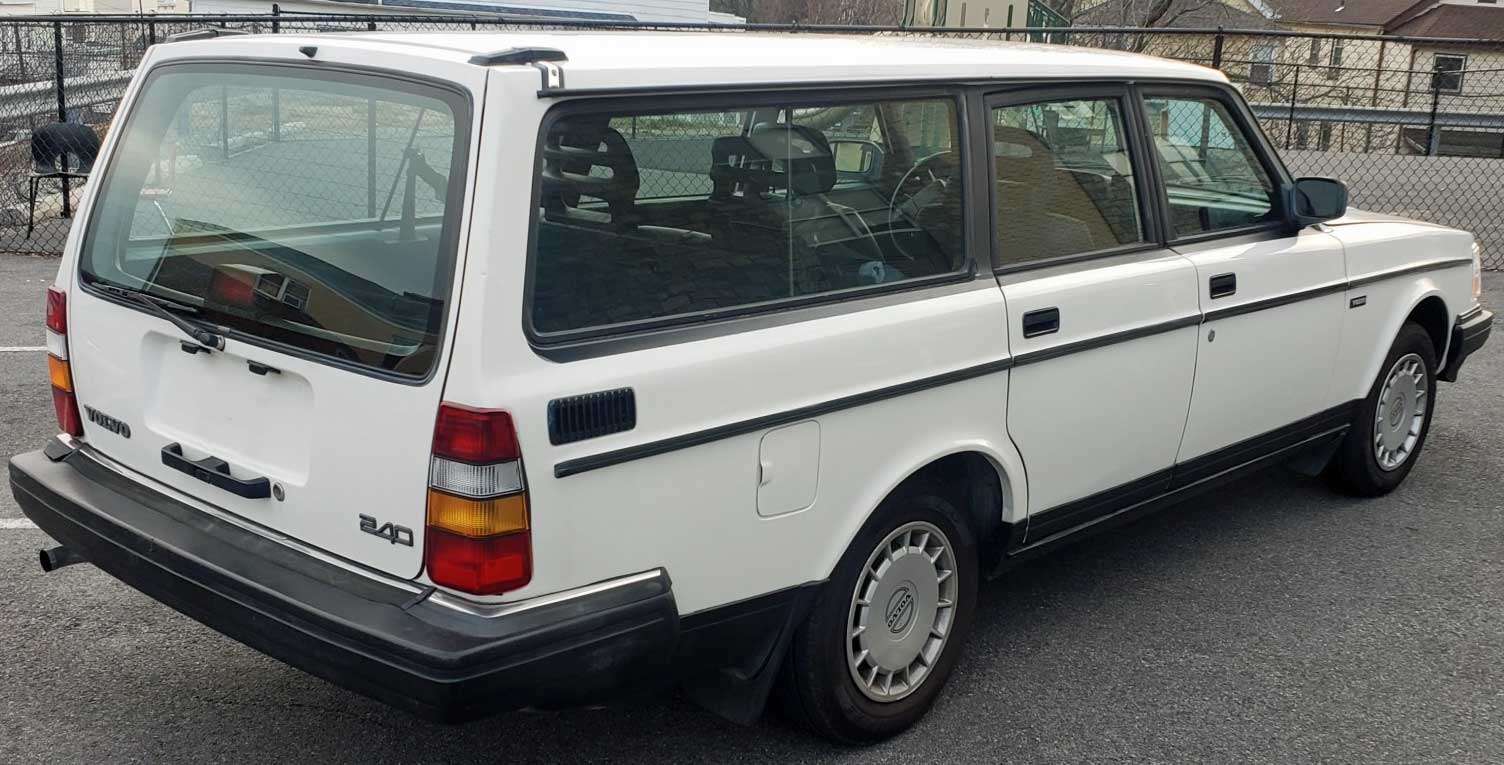 |
||||||||||||||||||

|
||||||||||||||||||
|
||||||||||||||||||
| INSTALLATION GUIDE Your feedback is welcome. Please email. |
||||||||||||||||||
|
If you own a 240 with old,
cracked door vinyl, this page will help with that.
To those of you who thought this black part was painted, NO, it was NEVER painted.
These stripes were always made from matte black vinyl that was
installed over the paint either by the factory or by a dealer.
These stripes first appeared on 240 Turbo
and GLT models beginning in 1981 (on all colors except for black cars. Black cars did not get door stripes). Later these stripes appeared on many other 240 sedans/saloons and wagons/estates through the end of the 1993 production.

|
||||||||||||||||||
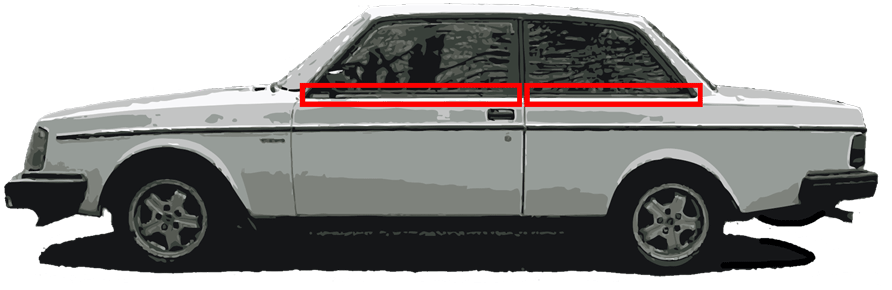
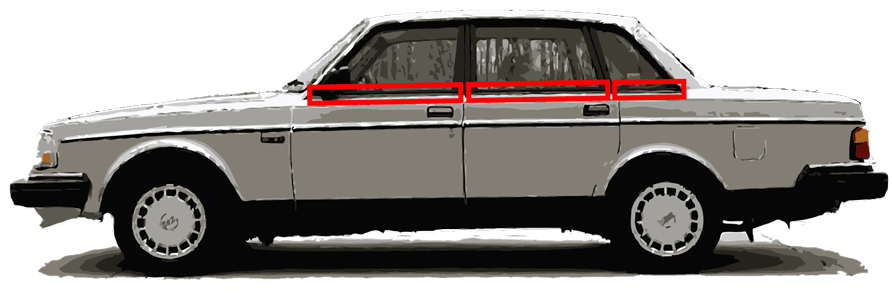
| Planning for Your STRIPE WIDTH | ||||||||||||||||||
| The width of these stripes varied over the years. Early cars had wider stripes and later cars had more narrow stripes. These stripes began in 1981 at about 2.5 inches (up to almost 3 inches wide in some instances). Beginning about 1986 and later these stripes were often found to be about 2 inches wide or LESS. So some planning can be important when you decide to install new stripes. The kits offered here provide vinyl stripe material that is WIDER than you will need. The below instructions will show you how to adjust, install and then TRIM your new stripes at the top so that ANY WIDTH you choose can be done. 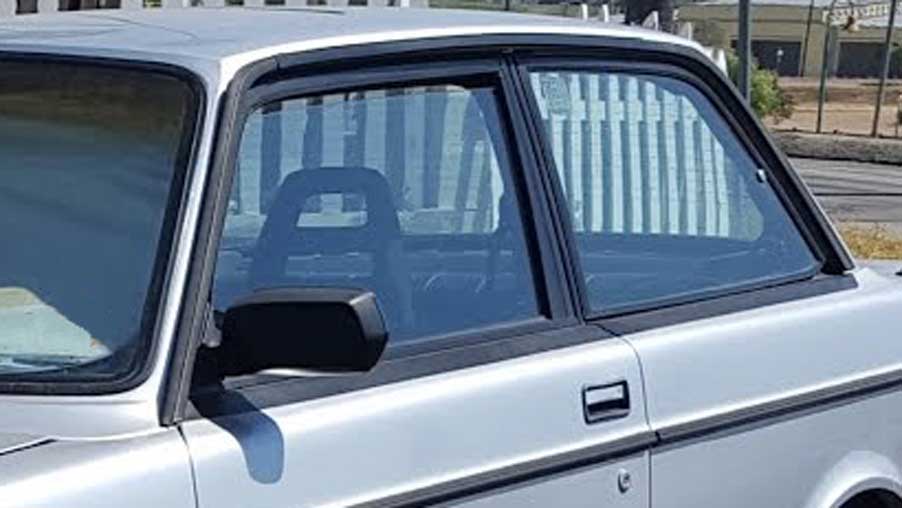
|
||||||||||||||||||
|
|
||||||||||||||||||
| STRIPE OPTIONS for your car. Explanation of CURVED Bottom Edge or STRAIGHT Bottom Edge. |
||||||||||||||||||
 STRAIGHT Bottom Edge: Most later NARROW stripes have a bottom edge that will usually be straight to the front of the door, as shown in this photo as a "STRAIGHT bottom edge." CURVED Bottom Edge: Some earlier WIDER stripes have a bottom edge that will curve at the front as shown in this photo as a "CURVED bottom edge." All Stripe Kits offered here may be ordered with a STRAIGHT bottom edge or CURVED bottom edge at the front or the door. |
||||||||||||||||||
|
|
||||||||||||||||||
 If you haven't yet removed the old stripes, now is a good time to take measurements of your original stripes and take some notes. If you haven't yet removed the old stripes, now is a good time to take measurements of your original stripes and take some notes. <<< Here is the front of the front door on an EXAMPLE 1987 244. Take note that this car has fairly narrow door stripes. |
||||||||||||||||||
|
|
||||||||||||||||||
 <<< When measuring from the outer edge of the metal trim strip that holds the rubber window scraper, the width of this stripe
near the front mirror is about 1.75 inches. 240 door stripes
don't usually get much narrower than this. Again, this photo is of a
1987 244. <<< When measuring from the outer edge of the metal trim strip that holds the rubber window scraper, the width of this stripe
near the front mirror is about 1.75 inches. 240 door stripes
don't usually get much narrower than this. Again, this photo is of a
1987 244. |
||||||||||||||||||
|
|
||||||||||||||||||
 TYPICAL NON-UNIFORMITY OF WIDTH from the factory: TYPICAL NON-UNIFORMITY OF WIDTH from the factory:<<< Same car. This measurement is at the rear of the front door. The stripe at this location is 2 inches wide. If a door strip changes in width by about 1/4 inch like this one does, it's not something you will notice when you stand back. So there's no need to worry about precision in the width. It will be much more important to make sure the bottom edge stays even or level as this one does while it moves from one door to another. |
||||||||||||||||||
|
|
||||||||||||||||||
 <<< Here is the front of the back door. If you're wondering
why this measurement is more than 1/4 inch narrower than the front door only a few inches away, it's because the metal scraper
trim piece sticks out a bit more. Yes, that's right. 240s are not
always made as precisely as you thought. The difference
here will never be noticed as long as the bottom edge of the stripe is even as it is in this photo. <<< Here is the front of the back door. If you're wondering
why this measurement is more than 1/4 inch narrower than the front door only a few inches away, it's because the metal scraper
trim piece sticks out a bit more. Yes, that's right. 240s are not
always made as precisely as you thought. The difference
here will never be noticed as long as the bottom edge of the stripe is even as it is in this photo. |
||||||||||||||||||
|
|
||||||||||||||||||
 <<< So by now you should understand that the stripes on a 240 do not have a
100% consistent width. Here at the rear of the back door the width
drops to under 1.5 inches. Again, the important thing here is an
even transition of the bottom edge at the door gaps. <<< So by now you should understand that the stripes on a 240 do not have a
100% consistent width. Here at the rear of the back door the width
drops to under 1.5 inches. Again, the important thing here is an
even transition of the bottom edge at the door gaps. |
||||||||||||||||||
|
|
||||||||||||||||||
 <<< Here is the front of the rear stripe. The width is slight under 1.5 inches at this point on this 1987 244. <<< Here is the front of the rear stripe. The width is slight under 1.5 inches at this point on this 1987 244. |
||||||||||||||||||
|
|
||||||||||||||||||
 <<< And the width near the back of this 244 stripe has dropped to just over 1.25 inches. <<< And the width near the back of this 244 stripe has dropped to just over 1.25 inches. A stripe that narrows slightly as it moves rearward may not be common, but the point of showing you these measurements is to show that perfect precision isn't that important (since it wasn't important at the factory). You are free to install your stripes any width you prefer. There is one other thing to mention about this image. As you can see, there is a small gap with a little bit of white paint peeking out near the drip rail. This would not be noticeable on a darker colored car, but it's something that can be avoided with some planning. Have a close look behind that drip rail and you'll see where it connects to the body. This is a small obstacle that you will need to watch for (and trim around), so that this gap can be avoided. |
||||||||||||||||||
|
|
||||||||||||||||||
 <<< Here's another view of the back on this 1987 244. <<< Here's another view of the back on this 1987 244. |
||||||||||||||||||
| When
you take measurements of your car before removing old stripes, feel
free to email me if you have questions or if you find anything unusual. CONTACT |
||||||||||||||||||
|
|
||||||||||||||||||
| REMOVING OLD
DOOR
VINYL And Installation Steps |
||||||||||||||||||
|
You
may be tempted to scrape off or sand off your old door
vinyl. Or you might be tempted to use a heat gun to melt it. These methods are up to you, BUT THEY ARE NOT RECOMMENDED.
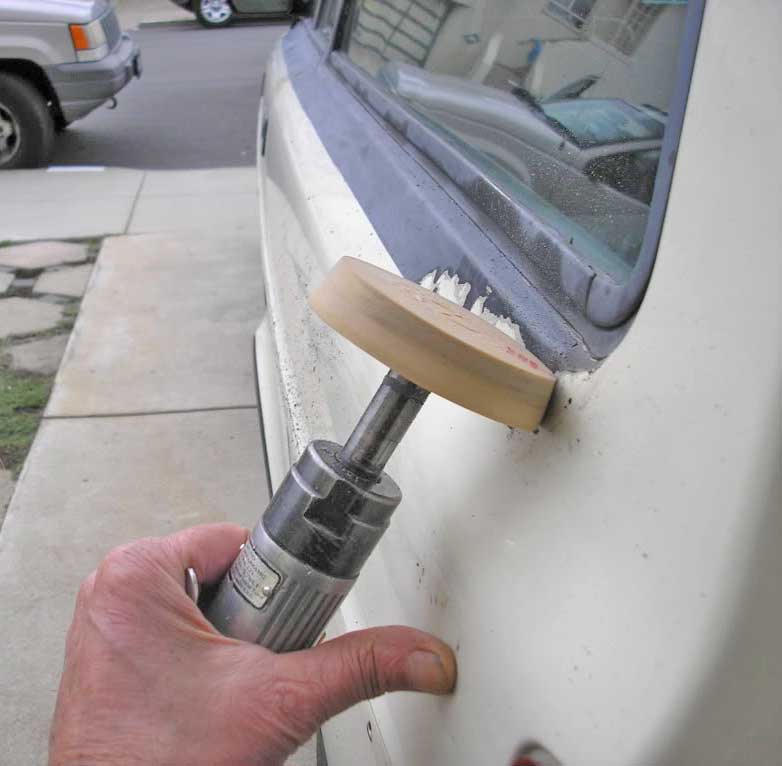
VINYL ERASER WHEEL The best recommendation so far that I have seen and used. I would try this first. This usually works VERY WELL. This vinyl eraser wheel will fit on your drill. It's made to remove vinyl graphics. A pneumatic drill is shown in this photo, but any drill will work. Vinyl eraser wheels are easy to find on-line. Here's one for about $10 from Amazon: https://www.amazon.com/Remover-Stickers-Minutes-Wheel-toolkit/dp/B00VFACQRE/ 
You can find more videos by searching for "vinyl erasure wheel." It is possible to go through TWO
of these eraser wheels on a large job like a 245 wagon/estate.
Here's a YouTube video on using an eraser wheel: https://www.youtube.com/watch?time_continue=1&v=IJLIvxmB7e4. Work slowly and try not to allow too much heat to build up on the paint. If the paint become too hot to touch, it may be getting too hot. This erasure wheel will buff the vinyl off and it'll do a much better job that any other method. In fact it will usually remove the vinyl without leaving any damage to the paint underneath. And if there is still some glue residue on the paint after, you may do some final cleaning with a mild solvent, such as Goo-Gone or some paint polish, rubbing compound or cleaner wax. |
||||||||||||||||||
|
|
||||||||||||||||||
|
This method is one I more recently
discovered (but I have not tried myself). So I cannot give you a
personal recommendation. This method has shown to work very well in user
videos, but you must use caution. This chemical has the potential to damage paint, so be sure to read the FAQs and user information and watch some videos.
As you'll see in these videos, this product is brushed on to your old vinyl graphics and it works slowly to soften the vinyl and adhesive, making it much easier to scrap off with a plastic scraper. The longer you leave the solution on the surface, the more aggressive the solution becomes to the vinyl, so it appears it's possible test it and use it for LIMITED TIME PERIODS, which can reduce or eliminate damage to your paint. And further, you can mask off your paint below the old vinyl to limit exposure to the solution. If you use this stuff, it's recommended to test it on a small area of your paint in a place that won't be quite so visible, in case it actually causes any damage to your particular type of paint. |
||||||||||||||||||
| Take your time
to clean your paint surface well. Before going forward, it should be SMOOTH to the TOUCH. If there are any chips, deep scratches or raised bumps in the paint, THEY WILL SHOW when the vinyl is put on. So do everything you can for a smooth surface. |
||||||||||||||||||
 <<< Keep this in mind. This surface pictured here is NOT quite ready yet. <<< Keep this in mind. This surface pictured here is NOT quite ready yet. The surface of your paint needs to be VERY SMOOTH to the touch before installing new vinyl. If there are any raised bumps that you can feel or small pieces of old vinyl that can be felt by touch, those bumps will probably show as imperfections after the vinyl is installed. So take your time and get things prepared smooth and clean. |
||||||||||||||||||
|
|
||||||||||||||||||
 For the front doors, it is recommended to remove the
side mirrors before starting. This will give you more room to work and trim vinyl. For the front doors, it is recommended to remove the
side mirrors before starting. This will give you more room to work and trim vinyl. |
||||||||||||||||||
|
|
||||||||||||||||||
 On some early 240s the mirrors are smaller and
may not interfere when installing vinyl, but still will likely get in the way of removing the
window scraper trim and removing old vinyl. So removing the mirrors is just plain recommended for all installations. On some early 240s the mirrors are smaller and
may not interfere when installing vinyl, but still will likely get in the way of removing the
window scraper trim and removing old vinyl. So removing the mirrors is just plain recommended for all installations. |
||||||||||||||||||
|
|
||||||||||||||||||
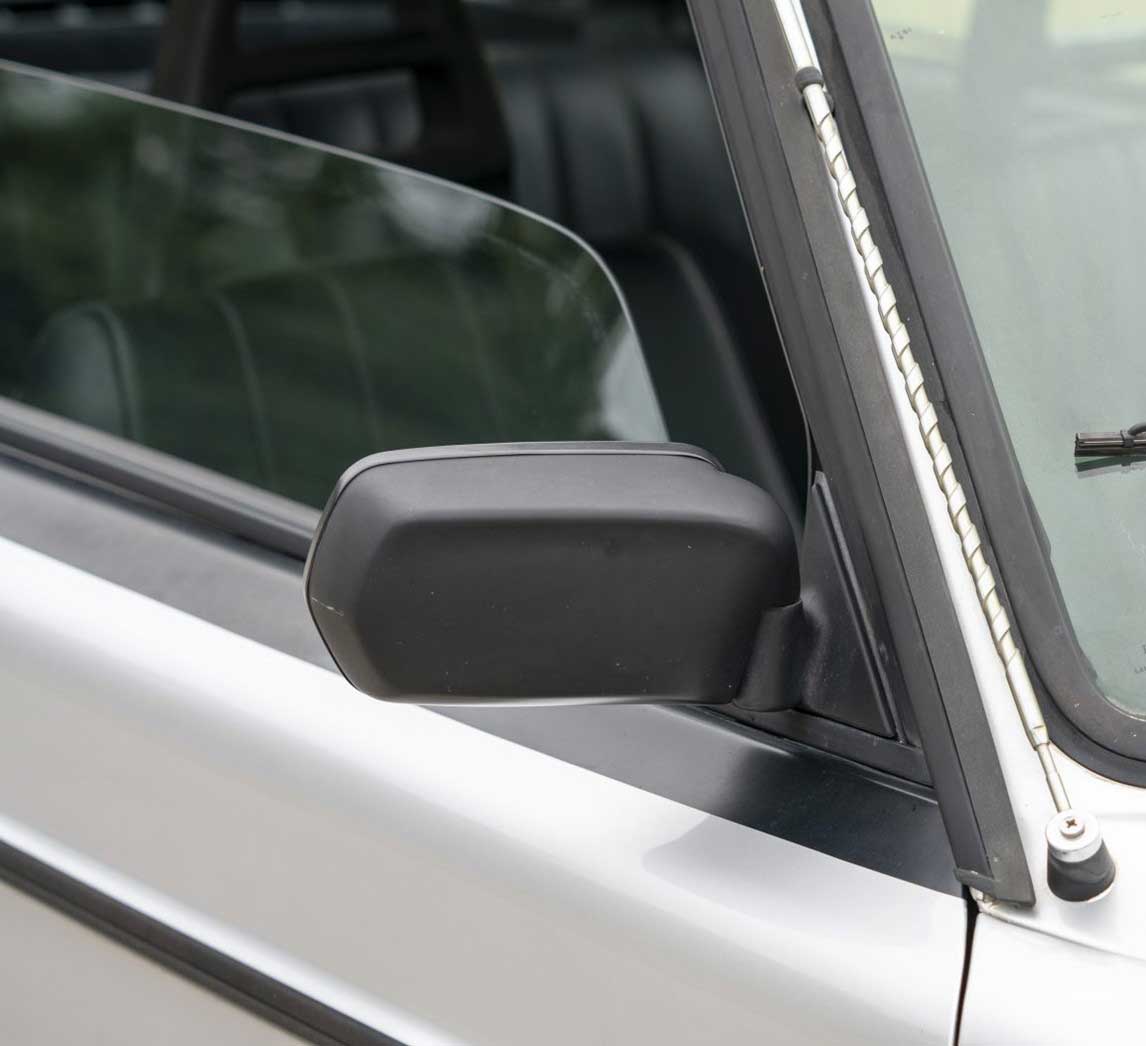
 Next step is to remove the window
rubber scraper molding metal strips. Those
simply pry UP and
OFF after you release the metal tab that wraps around the door. Next step is to remove the window
rubber scraper molding metal strips. Those
simply pry UP and
OFF after you release the metal tab that wraps around the door. The window scraper trim strip has a metal tab that wraps around the end of the door. On early models built before 1986, this tab hooks around the door on the front AND rear of the front doors. On front doors for later 240s (built after 1986), there is a tab at the rear only, because the front end of this strip tucks under the mirror on a later model. Carefully, use a flat screwdriver to bend these tabs out just a little and away from the door. It will not take much bending. |
||||||||||||||||||
|
|
||||||||||||||||||
 <<< Now
place the blade of a flat tool under the metal
strip near the rear of the door. Be careful to
avoid damaging your car paint below the tool. You can
help avoid damage by placing a piece of cardboard or
other material under the tool to protect the door. <<< Now
place the blade of a flat tool under the metal
strip near the rear of the door. Be careful to
avoid damaging your car paint below the tool. You can
help avoid damage by placing a piece of cardboard or
other material under the tool to protect the door.More complete instructions for removing or replacing the window scraper trim CAN BE FOUND HERE. |
||||||||||||||||||
|
|
||||||||||||||||||
 <<<
If you have a WAGON/ESTATE, you DO NOT need to remove the fixed trim and rubber seal around this
REAR SIDE GLASS. Removing this fixed
glass trim is a difficult task, so it is recommend to
leave it in place unless you have experience or will have a professional
do this part. <<<
If you have a WAGON/ESTATE, you DO NOT need to remove the fixed trim and rubber seal around this
REAR SIDE GLASS. Removing this fixed
glass trim is a difficult task, so it is recommend to
leave it in place unless you have experience or will have a professional
do this part. You may find more info on removing wagon side glass near the bottom of this page or CLICK HERE. You may consider covering this fixed trim with some masking tape to protect it while you're removing your old vinyl. |
||||||||||||||||||
|
|
||||||||||||||||||
 If you have a 4-door sedan/saloon, you can optionally remove this rear window frame. This is done by drilling out three rivets.
This is optional, but it is recommended because it will give you more
room to work on the fender-top areas without interference. When
done, the frame
can be reinstalled using rivets (black rivets would be best) or some
ordinary
screws (which most people use). If you have a 4-door sedan/saloon, you can optionally remove this rear window frame. This is done by drilling out three rivets.
This is optional, but it is recommended because it will give you more
room to work on the fender-top areas without interference. When
done, the frame
can be reinstalled using rivets (black rivets would be best) or some
ordinary
screws (which most people use). 
|
||||||||||||||||||
|
|
||||||||||||||||||
 If you have a 2-door coupe, you can remove this window and frame by
first removing the rear screw shown here by the arrow. That screw has a
large Phillips head. If it has never been removed before, it will be
tight (Volvo used a thread-lock adhesive). After this screw is
removed, the entire window may be lifted out by pulling it outward a few inches, then toward the
rear of the car. Use both hands and be CAREFUL that you don't drop it! That would be bad. If you have a 2-door coupe, you can remove this window and frame by
first removing the rear screw shown here by the arrow. That screw has a
large Phillips head. If it has never been removed before, it will be
tight (Volvo used a thread-lock adhesive). After this screw is
removed, the entire window may be lifted out by pulling it outward a few inches, then toward the
rear of the car. Use both hands and be CAREFUL that you don't drop it! That would be bad.
|
||||||||||||||||||
|
|
||||||||||||||||||
Most 240 door stripes are between 2 and 3 inches wide. When measuring the width of your old stripes, measure from
the window scraper metal trim strip to the bottom of the
black vinyl stripe. 240
Turbos and some other early 240s normally got 2.5 up to almost 3 inch wide stripes. Later cars usually had a more narrow
stripe (usually on 240s made after 1985). In the last few years of production,
there were 240s with 2 inch wide stripes or sometimes more narrow than 2 inches. 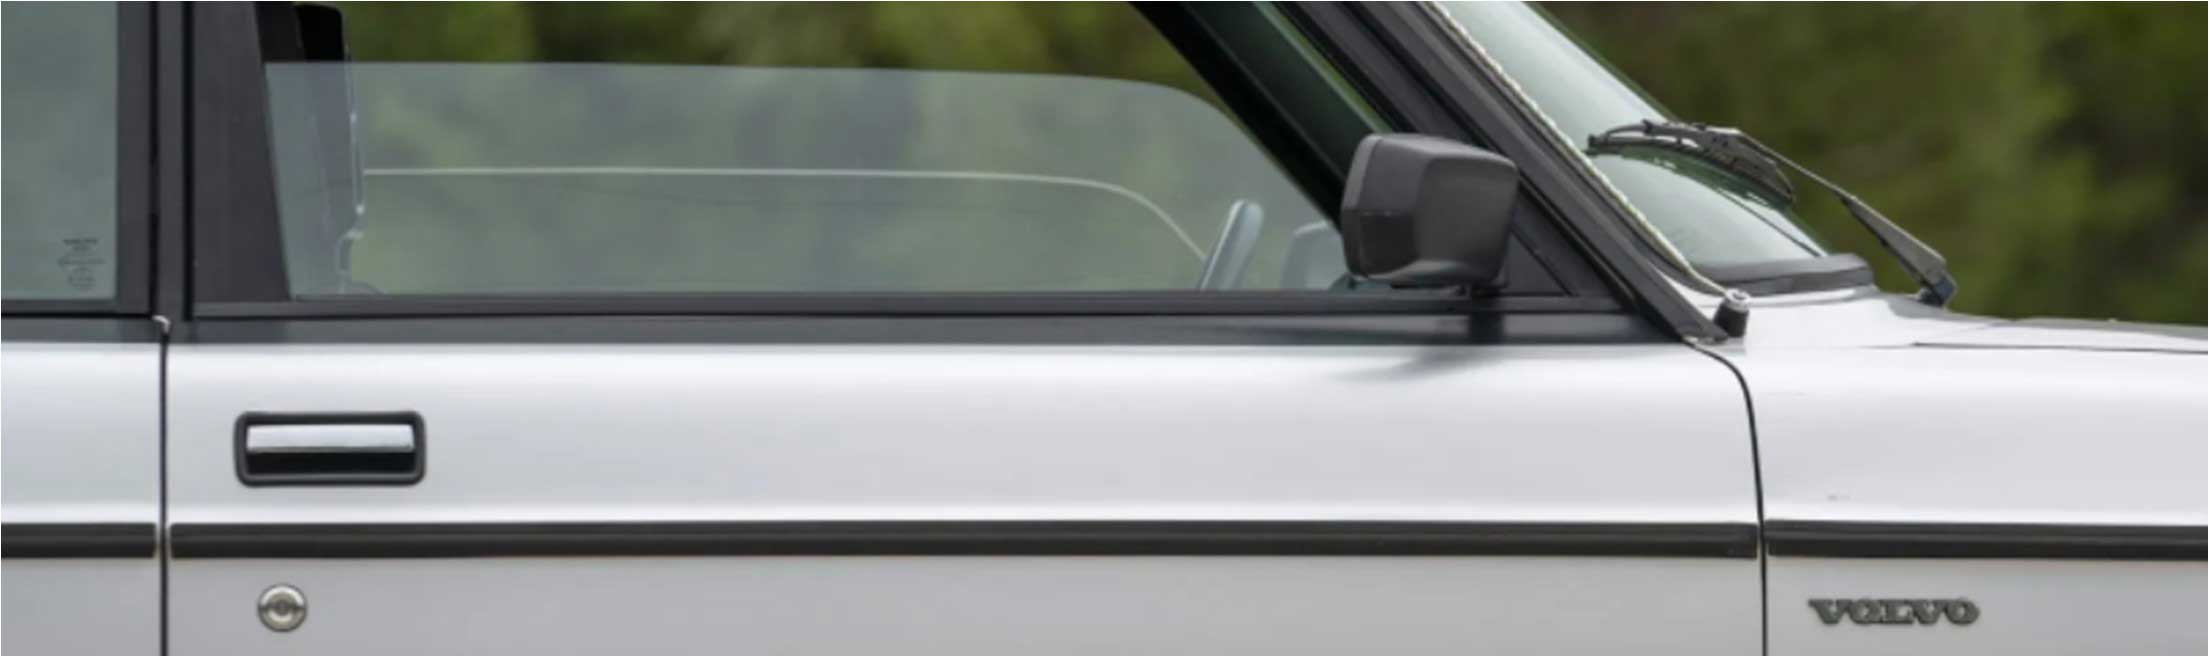 |
||||||||||||||||||
|
|
||||||||||||||||||
 The best recommended installation method is
the WET method, however these stripes can be done wet or dry. The
wet method involves
wetting the paint surface and also the back adhesive surface
of the vinyl (after removing the paper backing)
with slightly soapy water. The water/soap solution
allows you
to slide the vinyl into the precise position and then
you will
squeeze out any air pockets using a plastic squeegee.
This method is very forgiving and will give you nice results. The best recommended installation method is
the WET method, however these stripes can be done wet or dry. The
wet method involves
wetting the paint surface and also the back adhesive surface
of the vinyl (after removing the paper backing)
with slightly soapy water. The water/soap solution
allows you
to slide the vinyl into the precise position and then
you will
squeeze out any air pockets using a plastic squeegee.
This method is very forgiving and will give you nice results. Water/Soap Solution RECIPE: Mix a spray bottle with water and a few drops of dish soap. Something like Dawn dish soap works well. Dish soap only. Do not use dishwasher soap. There are a number of YouTube videos showing the installation of vinyl decals using the WET method. One is shown directly below. |
||||||||||||||||||
| Here's
a video showing both the dry and wet method. This is NOT a Volvo, however the concept for installation will be the same. https://www.youtube.com/watch?v=hS-AVKWGYYY |
||||||||||||||||||
|
WARNING:
If you're using the WET method, it is not recommended that you wet the vinyl until after removing the paper backing. One customer experienced a problem doing this with the backing becoming impossible to remove from the back of the vinyl. |
||||||||||||||||||
 When your car is ready for
the new stripes, you can use some masking tape to mark positions
along the door where you want the BOTTOM EDGE of the
new stripe to be. I recommend laying down a straight masking tape line and then stand back and evaluate how it looks.
This will help keep your new stripes straight and even
during installation. When your car is ready for
the new stripes, you can use some masking tape to mark positions
along the door where you want the BOTTOM EDGE of the
new stripe to be. I recommend laying down a straight masking tape line and then stand back and evaluate how it looks.
This will help keep your new stripes straight and even
during installation. When installing these pieces, install them one door at a time or one piece at a time. |
||||||||||||||||||
|
|
||||||||||||||||||
 <<< This plastic squeegee has felt on one edge.
The felt edge helps prevent scratches on the black vinyl
surface when you're smoothing it out. <<< This plastic squeegee has felt on one edge.
The felt edge helps prevent scratches on the black vinyl
surface when you're smoothing it out.When you're ready to begin installation, peel the paper backing off the vinyl stripe and then spray the adhesive side of the vinyl with the soapy water solution. Also spray the car surface. Using lots of water solution is fine. It should be good and slick so the vinyl can be slide and moved into position as you work. . Lay the vinyl stripe on the car, adhesive side down, and slide it into place. Then ALSO spray the top surface of the stripe (to lubricate the surface) and carefully squeegee or smooth it down while pushing out any trapped water or air pockets, beginning in the center and moving outward. If needed, you may still lift sections of the vinyl and re-spray underneath and begin again in case things begin drying before you finish positioning, but once you begin squeezing out the water, the adhesive will begin to get stronger. The soapy water being sprayed on the top surface of the vinyl is there to lubricate the surface and will help minimize scratches in the vinyl from the squeegee. If you don't have a felt-lined squeegee, use what you have. You can also wrap a squeegee or even a credit card in a soft microfiber cloth to help minimize scratches. Once the vinyl is in position and begins to set, trimming the edges can begin. |
||||||||||||||||||
|
|
||||||||||||||||||
 <<< This view is the FRONT of the front door of a later 240 near the
A-pillar. The side mirror and the window scraper trim were removed before installation. <<< This view is the FRONT of the front door of a later 240 near the
A-pillar. The side mirror and the window scraper trim were removed before installation.Use your water/soap solution to wet things down on the car surface and also wet down the adhesive after removing the paper backing. . |
||||||||||||||||||
|
|
||||||||||||||||||
 <<< Lay the new vinyl stripe down. The stripe material is initially wider than needed,
so it will need to be trimmed AT THE TOP AFTER it has been placed into position. Move or slide the vinyl
into it's final position and use your squeegee to squeeze out water,
beginning in the center and moving outward. Yes, the door handle is
missing on this door in this photo (because this car just got painted), but it does not need to be removed for this
installation. <<< Lay the new vinyl stripe down. The stripe material is initially wider than needed,
so it will need to be trimmed AT THE TOP AFTER it has been placed into position. Move or slide the vinyl
into it's final position and use your squeegee to squeeze out water,
beginning in the center and moving outward. Yes, the door handle is
missing on this door in this photo (because this car just got painted), but it does not need to be removed for this
installation. |
||||||||||||||||||
|
|
||||||||||||||||||
 <<< Use
your knife to trim the excess vinyl at the top, which is later hidden
by the window scraper molding when it re-installed. Trim it in a place
that you know will be hidden under the scraper metal trim. It;s very
important that the scraper trim covers the top edge of the vinyl. <<< Use
your knife to trim the excess vinyl at the top, which is later hidden
by the window scraper molding when it re-installed. Trim it in a place
that you know will be hidden under the scraper metal trim. It;s very
important that the scraper trim covers the top edge of the vinyl. |
||||||||||||||||||
|
|
||||||||||||||||||
 <<<
In this photo the front end of this stripe has been trimmed so that
there is a
small amount of vinyl to be folded over the door edge. Using some
heat from a hair dryer can help to draw out water and flatten out the
edges of the vinyl in some circumstances if water seems to be still trapped
under. Some heat can also help when forming the trimmed end over the
door edge. <<<
In this photo the front end of this stripe has been trimmed so that
there is a
small amount of vinyl to be folded over the door edge. Using some
heat from a hair dryer can help to draw out water and flatten out the
edges of the vinyl in some circumstances if water seems to be still trapped
under. Some heat can also help when forming the trimmed end over the
door edge.
|
||||||||||||||||||
|
|
||||||||||||||||||
 On some installations where the stripe is not
very wide, some people prefer to reduce or eliminate the gradual curve
up at the front of the front door. This can be done easily by either moving the
stripe forward to reduce the curve or you may flip the stripe 180 degrees to
eliminate it completely and install it with a straight bottom edge. Or you may order stripes with NO CURVE cut onto the front door pieces. On some installations where the stripe is not
very wide, some people prefer to reduce or eliminate the gradual curve
up at the front of the front door. This can be done easily by either moving the
stripe forward to reduce the curve or you may flip the stripe 180 degrees to
eliminate it completely and install it with a straight bottom edge. Or you may order stripes with NO CURVE cut onto the front door pieces. |
||||||||||||||||||
|
|
||||||||||||||||||
The
final result can be a beautiful thing! The stripes on this later
240 were made to be about 2 inches wide. The width of the
stripe may be set to whatever you
like before you trim off the excess at the top (or under that window scraper molding).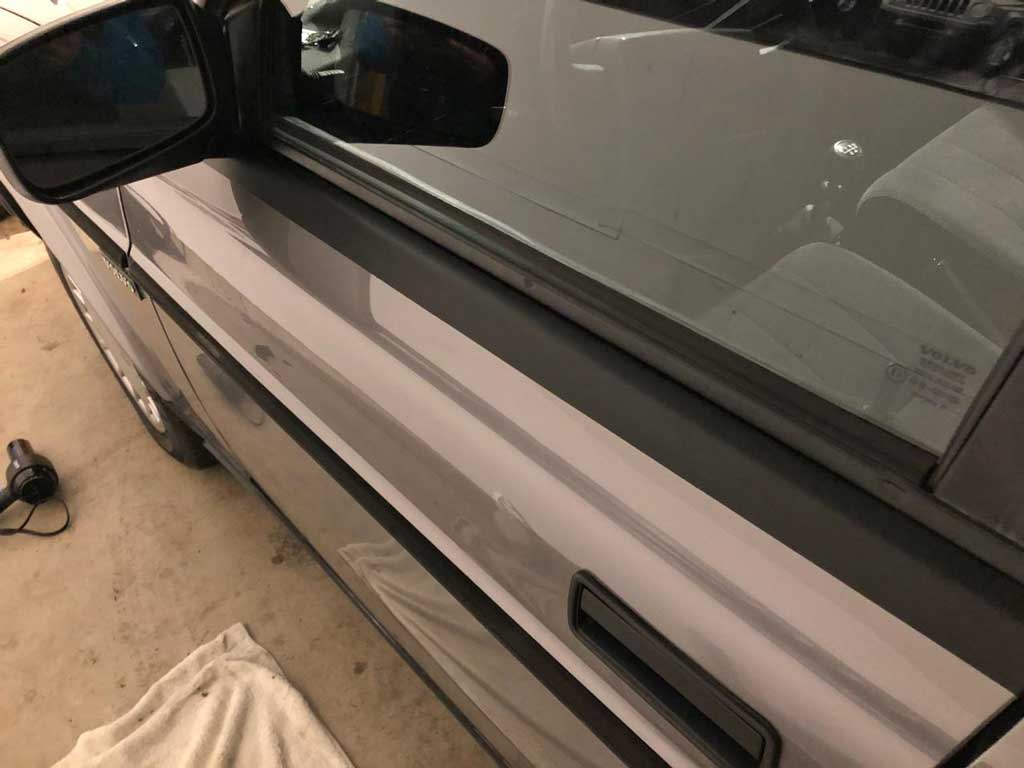 |
||||||||||||||||||
|
|
||||||||||||||||||
 <<< It may be hard to see in this pic,
but here is an image of a wider stripe a with a gradual curve on the FRONT bottom edge of the front door. <<< It may be hard to see in this pic,
but here is an image of a wider stripe a with a gradual curve on the FRONT bottom edge of the front door. This is a 1984 240 with a wider stripe. |
||||||||||||||||||
|
|
||||||||||||||||||
 <<< Another EARLY 240. Here's a pic showing
how the rear piece on a 4-door car curves upward and how it lines up with
the back edge of the rain gutter trim. <<< Another EARLY 240. Here's a pic showing
how the rear piece on a 4-door car curves upward and how it lines up with
the back edge of the rain gutter trim. |
||||||||||||||||||
|
|
||||||||||||||||||
 <<<
Here's
a pic showing how the old REAR PIECE on a WAGON/ESTATE model curves upward
and
how it lines up with the end of the rubber window
trim.
Removing the window glass and rubber trim on a
wagon/estate is
difficult and for most installations this will be done with that glass
and rubber seal in place. In these cases after installing this piece you
will need to carefully
trim the vinyl where it meets the rubber seal as
closely as you can. <<<
Here's
a pic showing how the old REAR PIECE on a WAGON/ESTATE model curves upward
and
how it lines up with the end of the rubber window
trim.
Removing the window glass and rubber trim on a
wagon/estate is
difficult and for most installations this will be done with that glass
and rubber seal in place. In these cases after installing this piece you
will need to carefully
trim the vinyl where it meets the rubber seal as
closely as you can.
|
||||||||||||||||||
|
|
||||||||||||||||||
 <<<
Again a photo from an EARLY 4-door sedan.
Here's a view of how the vinyl is wrapped or folded over the edge and trimmed on
the rear fender piece behind the rear door. After you
install the vinyl, you should trim it to about 1/4 to 3/8 inch
below the fender outer surface. <<<
Again a photo from an EARLY 4-door sedan.
Here's a view of how the vinyl is wrapped or folded over the edge and trimmed on
the rear fender piece behind the rear door. After you
install the vinyl, you should trim it to about 1/4 to 3/8 inch
below the fender outer surface. |
||||||||||||||||||
|
|
||||||||||||||||||
 <<< Here a view of the front end of a 245 WAGON/ESTATE REAR STRIPE
near the back of the rear door. The vinyl is wrapped or folded over
and trimmed on the rear fender piece behind the rear
door. You should trim it to about
1/4 to 1/2 inch below the fender outer surface. <<< Here a view of the front end of a 245 WAGON/ESTATE REAR STRIPE
near the back of the rear door. The vinyl is wrapped or folded over
and trimmed on the rear fender piece behind the rear
door. You should trim it to about
1/4 to 1/2 inch below the fender outer surface. |
||||||||||||||||||
|
|
||||||||||||||||||
 <<< This image applies to any
240 door where the door metal appears like this with an
overhang. The vinyl is trimmed and folded over the edge and under
the overhang. Again, it will be important to first
clean this underside
area well so the vinyl adheres to the surface under
there and stays that way. <<< This image applies to any
240 door where the door metal appears like this with an
overhang. The vinyl is trimmed and folded over the edge and under
the overhang. Again, it will be important to first
clean this underside
area well so the vinyl adheres to the surface under
there and stays that way. |
||||||||||||||||||
|
|
||||||||||||||||||
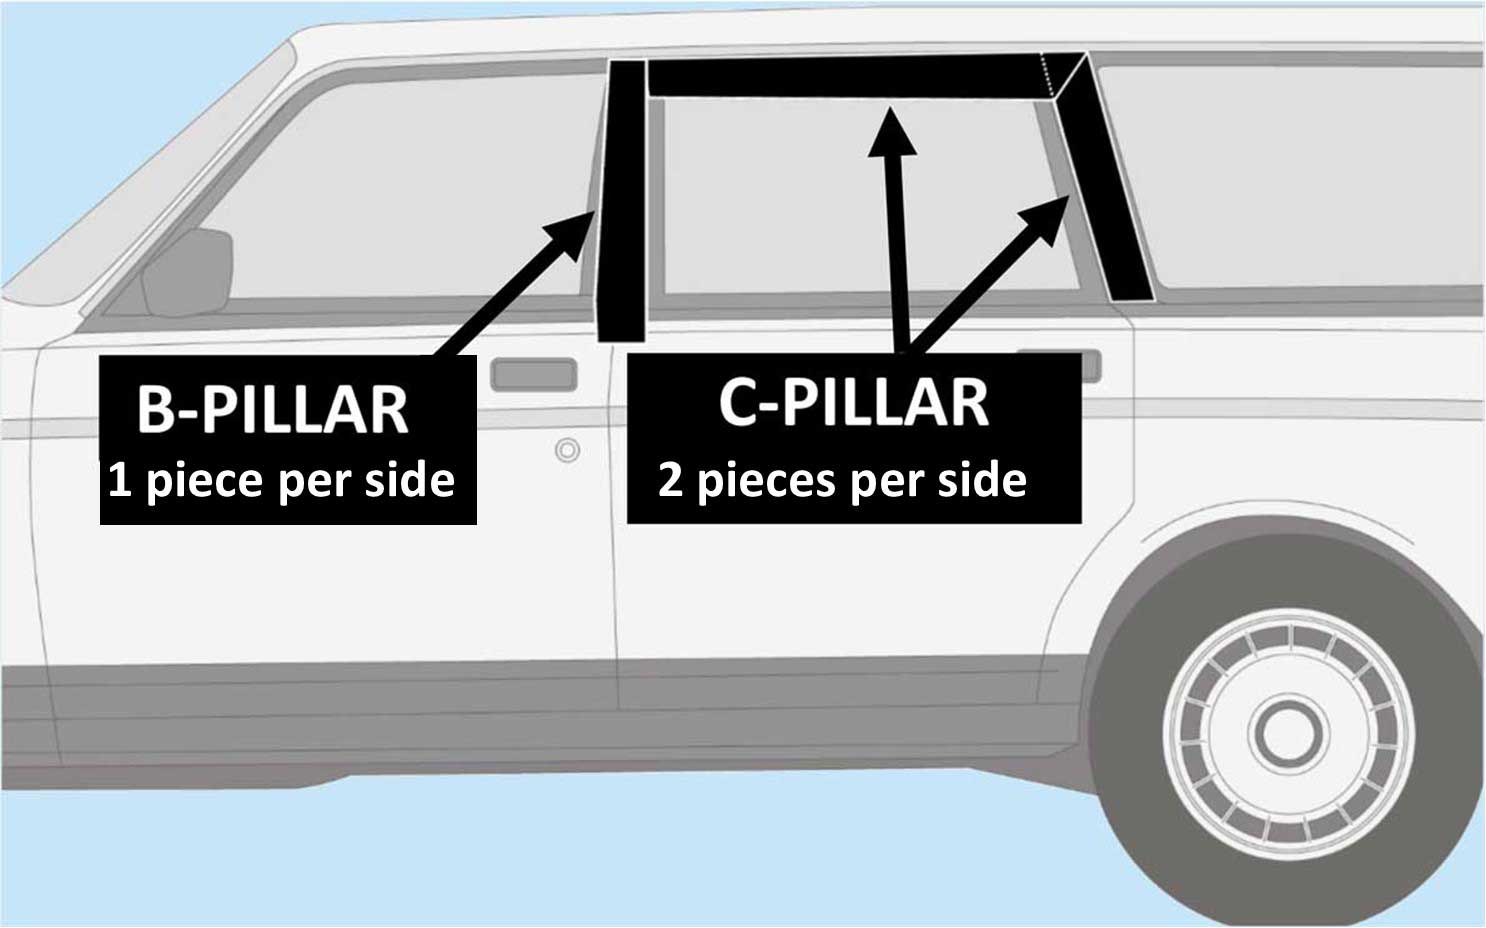
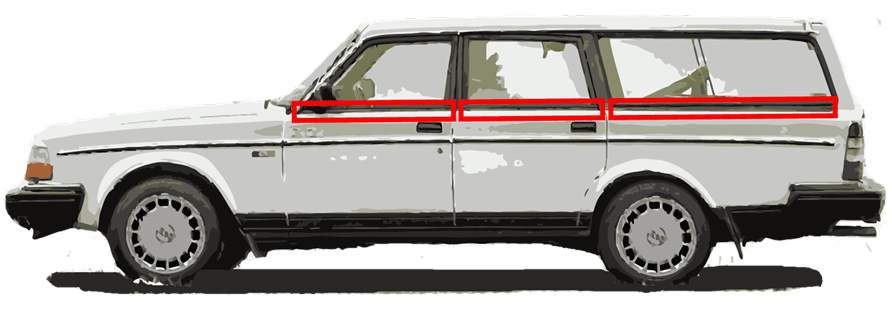
| INSTALLATION GUIDE 245 (wagon/estate) B and C Pillars Your feedback is welcome. Please email. |
||||||||||||||||||
 |
||||||||||||||||||
|
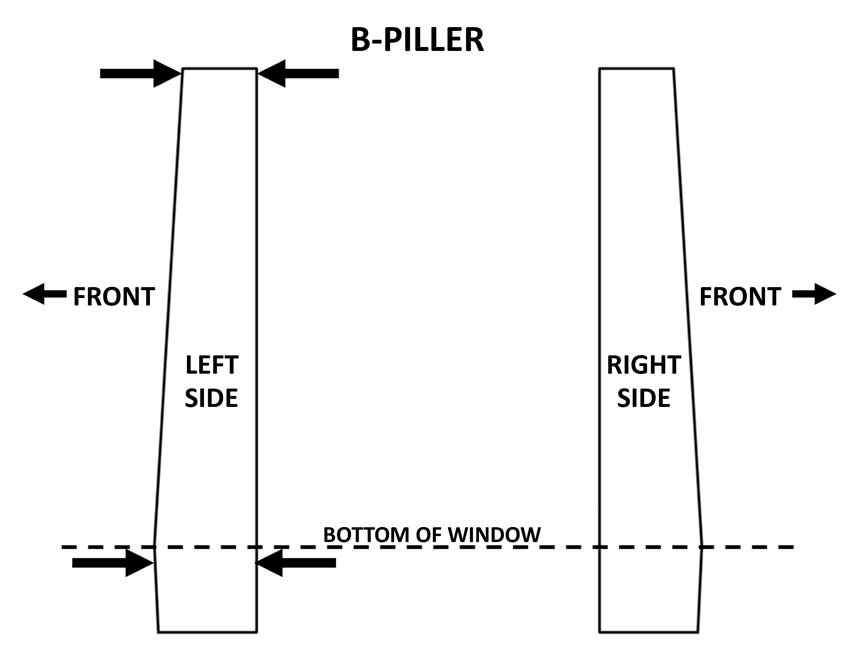
B-Pillar Vinyl Pieces (1 piece per side) The below image shows the general shape of the B-pillar pieces (left and right sides respectively). These pieces will come as two pieces trimmed to the proper width. They will have some extra length, so the top and bottom will need to be trimmed to fit. Also note that there is a slight taper on the front edge (facing the front of the car). The taper begins at the dashed line shown below and the front edge tapers as it goes up from that dashed line. The dashed line position shown below should be at the approximate level of the window scrapers or top of the door/bottom of window. You should try a trial fit to test/verify positioning of these before peeling the back and installing. |
||||||||||||||||||
|
||||||||||||||||||
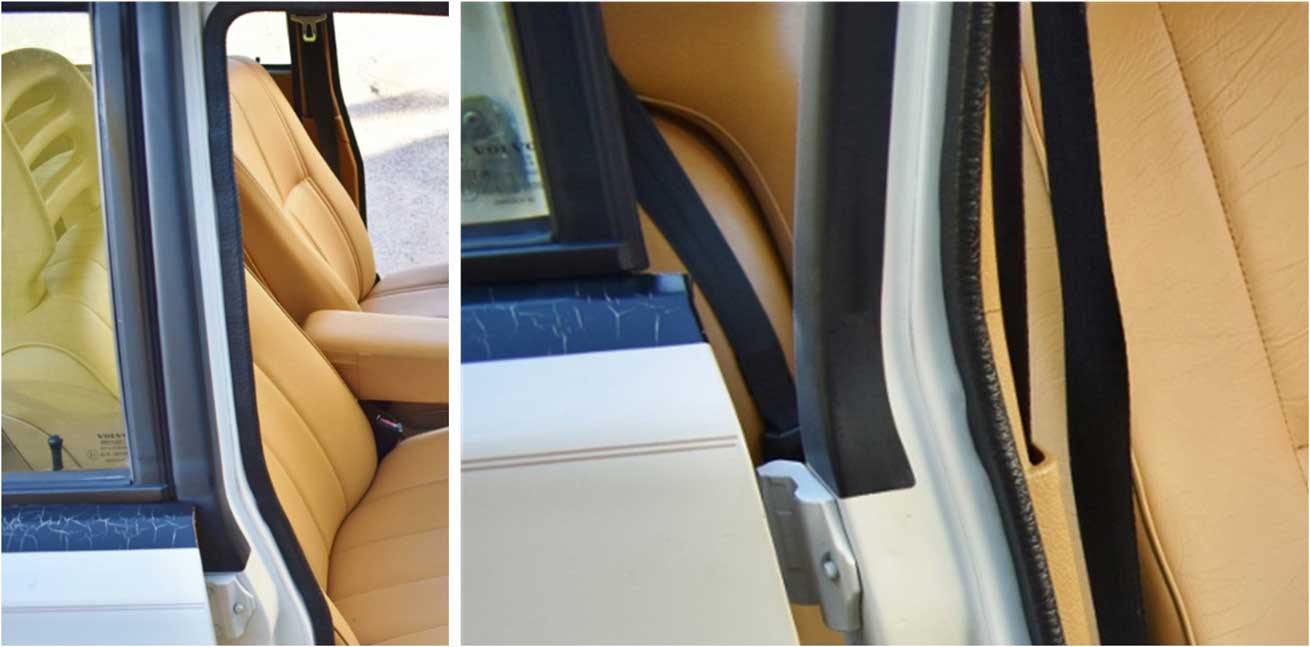 The vinyl should be installed as shown above. Over the years, I have found TWO DIFFERENT original factory installation styles for this B-pillar (and C-Pillar) vinyl. These images ABOVE show an installation of vinyl onto a B-pillar that was painted body color. 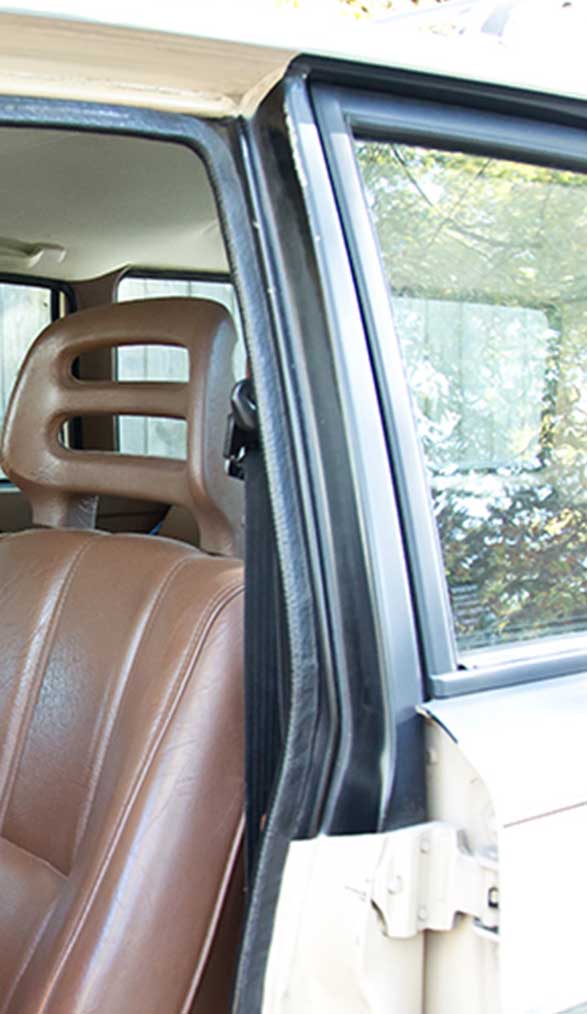 Some OTHER original factory installations have been found as shown ABOVE, where the B-pillar (and C-pillar) were painted black first, then the vinyl was added. Installers who have done this restoration recommend using Würth brand black trim paint to paint the black area. |
||||||||||||||||||
|
|
||||||||||||||||||
| C-Pillar Vinyl Pieces (2 pieces per side) The below images show the general shape of the C-pillar pieces (left and right sides respectively). The long top horizontal pieces will come trimmed as shown with a slight taper along the length. They will have a little extra length, so you will need to trim the ends to the length as you need it. The shorter vertical pieces will come as two 4 inch wide pieces and these will also need the top/bottom trimmed to fit during installation. Please note that the overwhelming consensus from looking at original cars has been that the top horizontal stripe always overlaps the vertical stripe. If you find something different on an original car, please let me know.
C-pillar vinyl installation. Similar to as mentioned above for the B-pillar, TWO DIFFERENT original factory installation styles of installation for this C-pillar vinyl have appeared over the years.  One method ABOVE shows how the factory installed the vinyl over body pillars that were painted body color. This second installation style shown BELOW shows a car on which the factory first painted the pillar area BLACK. 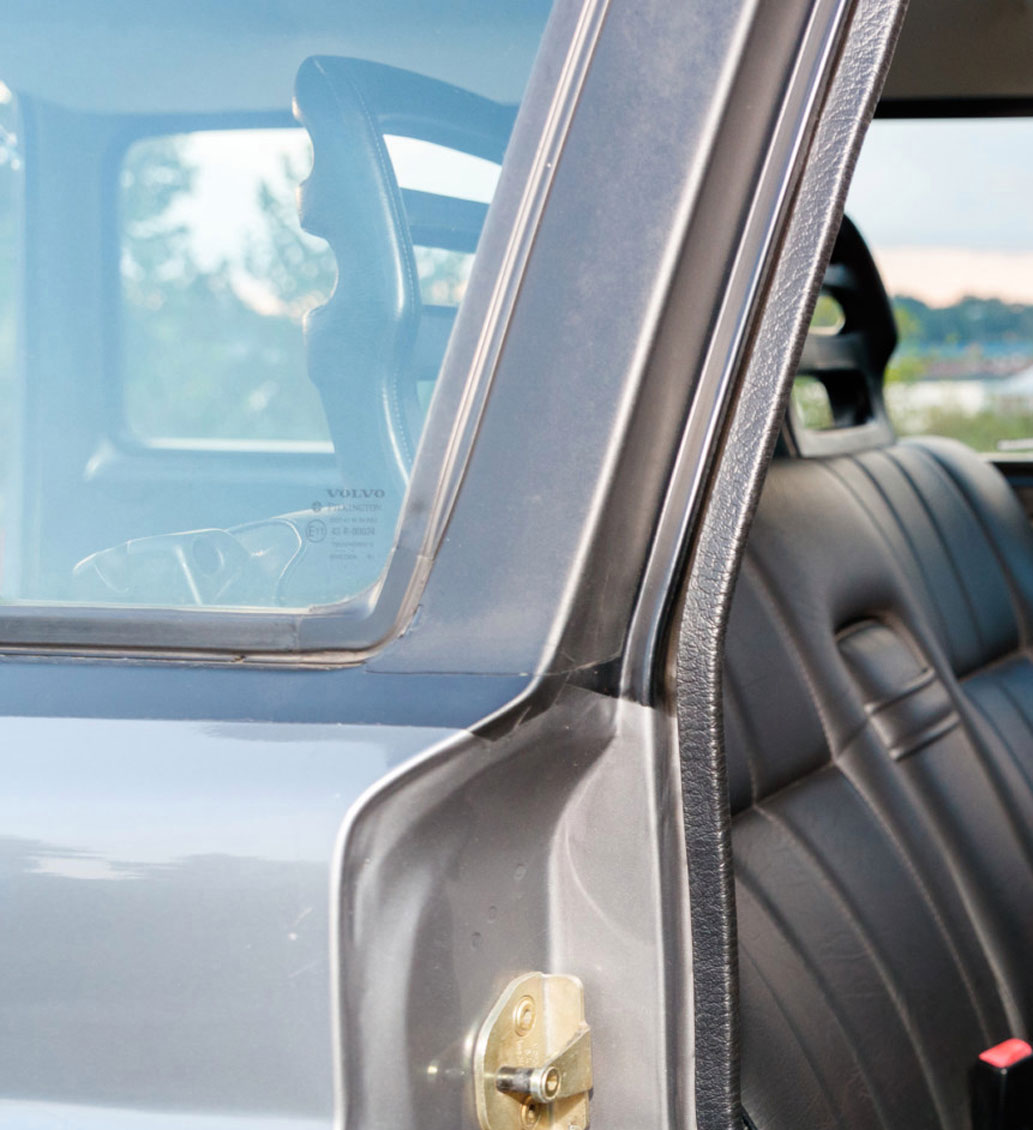 The ORIGINAL C-pillar vinyl was installed at the factory BEFORE the rear side glass windows and trim was installed, so the vinyl wraps around the pillar and UNDER the rubber seal for these rear side windows.  REMOVING SIDE GLASS So it appears the "proper" and most professional way to replace that vertical black vinyl piece will be to first remove the glass and seal. If you choose to do this, there are a couple methods. One method is done by feeding a piece of piano wire between the seal and body and move it along the perimeter of the window to release the grip of the rubber from the body. Then the seal can be folded from the inside and the glass and seal can be slowly and gently pushed outward. This method puts less force on the glass, so less risk of breaking it. Another method is outlined here: https://www.matthewsvolvosite.com/forums/viewtopic.php?t=41014 Here are the steps: First remove the embedded metal trim molding on the outside if it is fitted to the rubber seal. Get some 1/4 inch nylon rope and a can of silicone spray lube. Spray the rubber seal on inside liberally and liberally coat the rope. Fold one of the top corners of the seal and put the rope in the rubber seal all the way round the window. Use some 6 inch long pieces of 2 x 2 wood to push the window out at the back vertical edge while pulling the rope to fold over the rubber seal to allow window to go out. Once the back edge seal is outside the metal edge, then go forward along top edge and then down the front edge. You will need a second person before you get too far to be sure the glass doesn't fall out and break. Use the 2 x 2 to push outward (with not too great force) to ease the rubber seal past the edge. Once the second side is started, the removal usually gets much easier pretty quickly. Install by setting the seal over the bottom edge with rope already in the seal on the other three sides. Use silicone spray liberally, Lubrication is your friend in this job on removal and installation. Pull the rope inside to get the rubber seal edge to go over the metal edge. Have an assistant on the outside pushing in with a 2 x 2 gently in the area you are working with rope. Get a plastic trim tool, generally referred as a "bone tool." It is used to pop off moldings and trim but it is great at helping the rubber over metal edge without harming paint or molding like a metal tool might. |
||||||||||||||||||
| VIDEOS PART 1: This video demonstrates techniques for the removal of the Volvo 240 wagon rear side glass. https://www.youtube.com/watch?v=kGHge1Q0NIg |
||||||||||||||||||
| PART 2: This video demonstrates techniques for the removal of the Volvo 240 wagon rear side glass. https://www.youtube.com/watch?v=gy-D7iUhrVE |
||||||||||||||||||
| PART 3: This video demonstrates techniques for the re-installation of the Volvo 240 wagon rear side glass. https://youtu.be/L7nHKUWA8tE |
||||||||||||||||||
|
|
||||||||||||||||||
This video demonstrates the removal and installation of a VERY similar window in a Jeep Cherokee. Same techniques will apply. https://www.youtube.com/watch?v=RBXAIkRCBAs |
||||||||||||||||||
|
|
||||||||||||||||||
Another method for the Volvo 240 Wagon is shown in the below VIDEO where a bit more brute force is used from the inside. If you do not have experience in removing this sealed side glass, using someone who has actual experience would probably be a good idea. |
||||||||||||||||||
| How to Remove the Rear Cargo / Quarter Panel Window on a Volvo 240. https://www.youtube.com/watch?v=A1KaS4LgMII |
||||||||||||||||||
| If you have any
comments or if you can help to improve this
information, or if you can provide photos of your
installation process,
please email me. CONTACT |

|


 alternators are known for poor voltage.")


