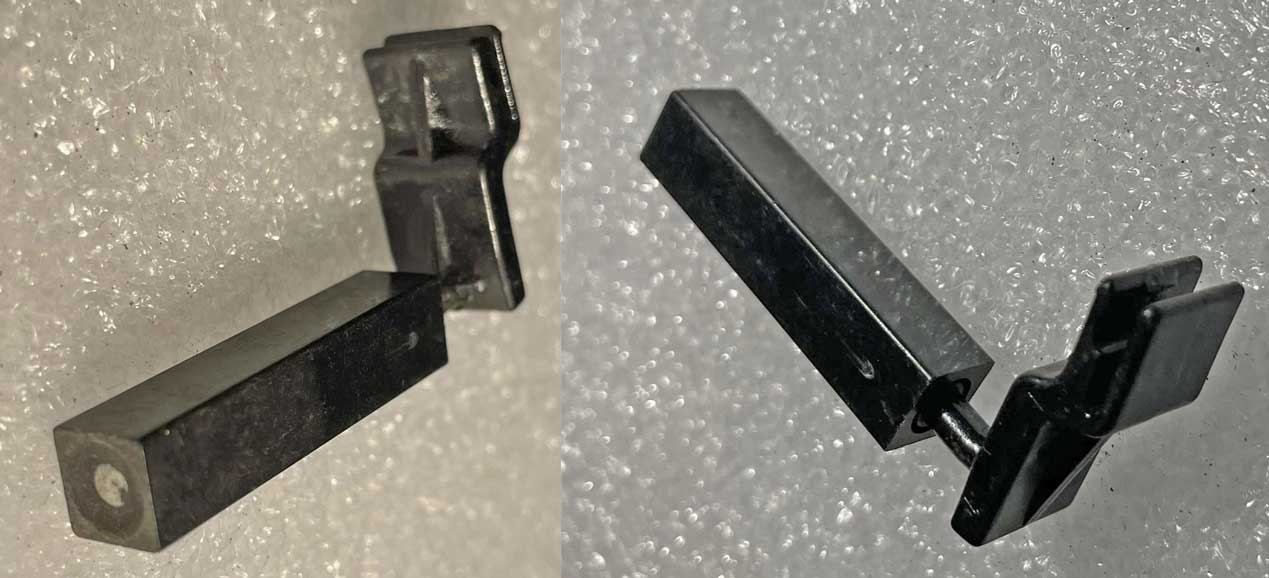
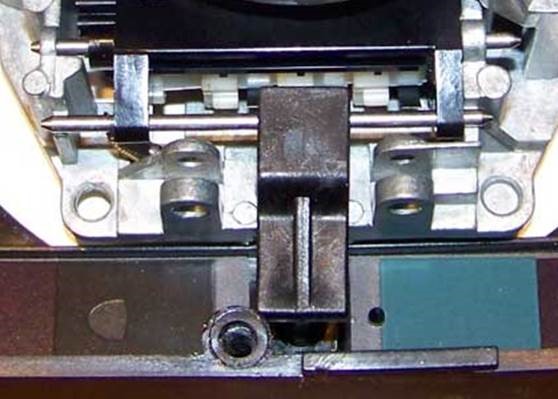
Factory Anti-Tamper Device and Cable Locking Collar
When you're removing your instrument cluster, you may find this ANTI-TAMPER DEVICE next to the speedometer cable locking collar. It was placed on ALL cable speedo cars by Volvo. These days MOST of them are
already missing, which means it has already been removed by someone. It must be removed
to access the speedo cable collar, so that it can disconnected. It
can only be removed by breaking it or by prying it off. Once broken, it
cannot be placed back on, so it may be discarded. Then you may twist the cable locking collar 90 degrees to the LEFT to unlock the cable from the speedo. The cable and collar then pulls straight out.
The above RIGHT photo shows a broken locking collar. This can happen if the cable is pulled or bent without first unlocking the collar. This is not the correct way to disconnect a speedo cable, since the cable
collar can no longer hold the cable in place. This speedometer above
would require a new cable assembly.
|
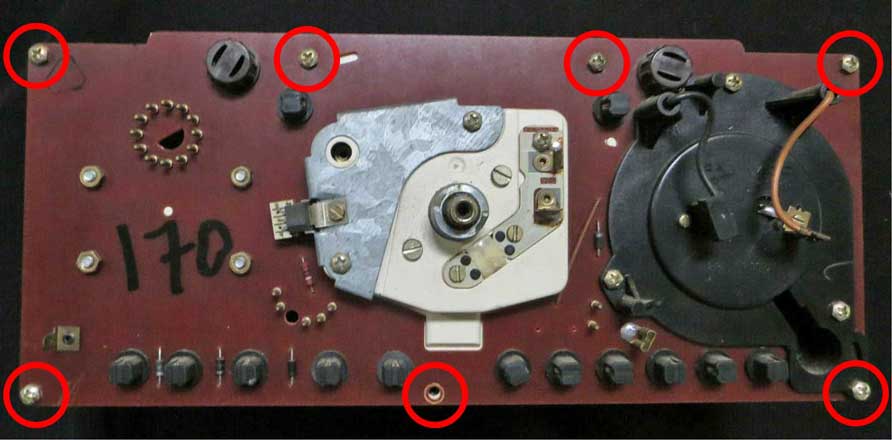
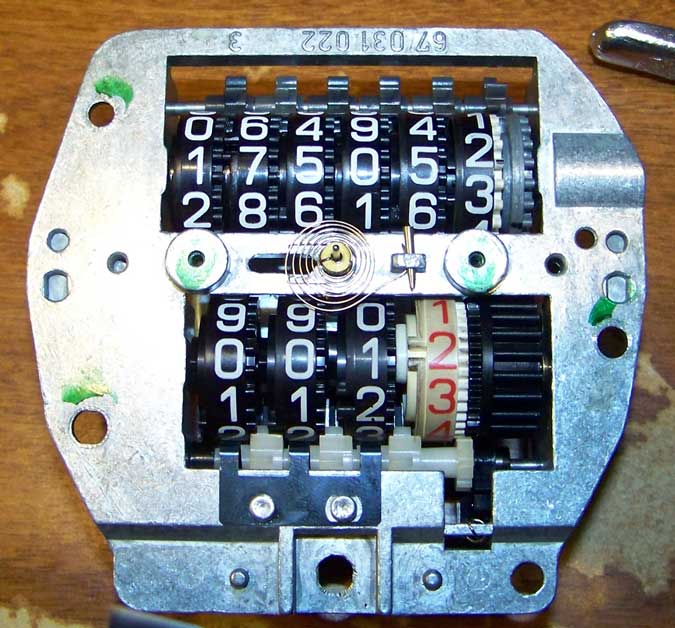
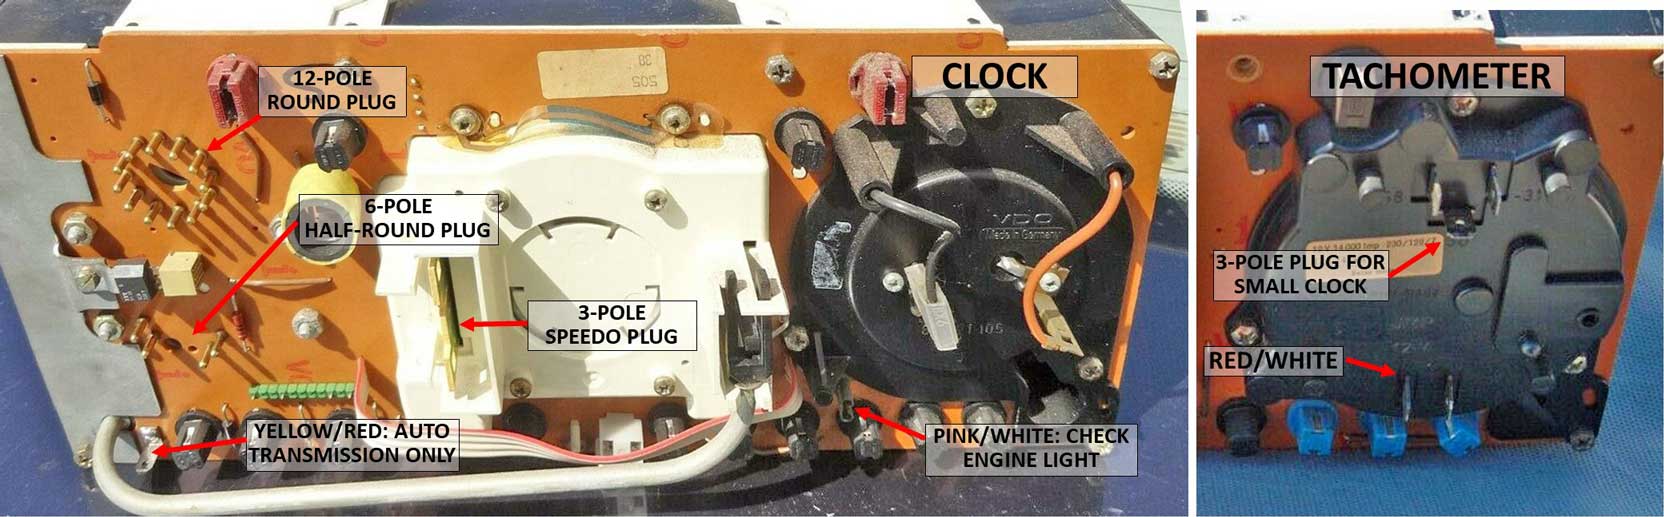
Here's the back of your typical 1981-1985
240 instrument cluster. This one has a CLOCK.
Locate and remove the 7 Phillips head screws around the outer edge.
|
If you have a TACHOMETER, your instrument cluster will look like this.
|
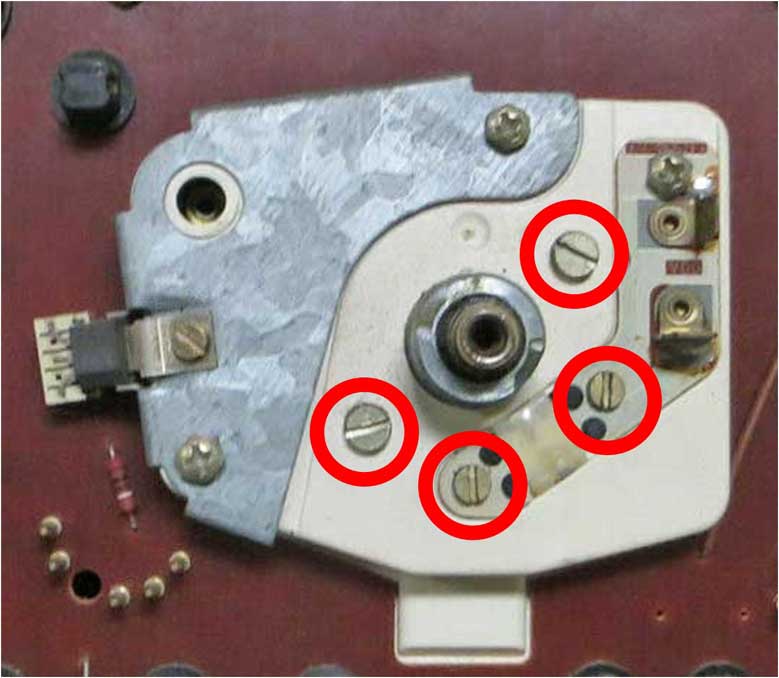
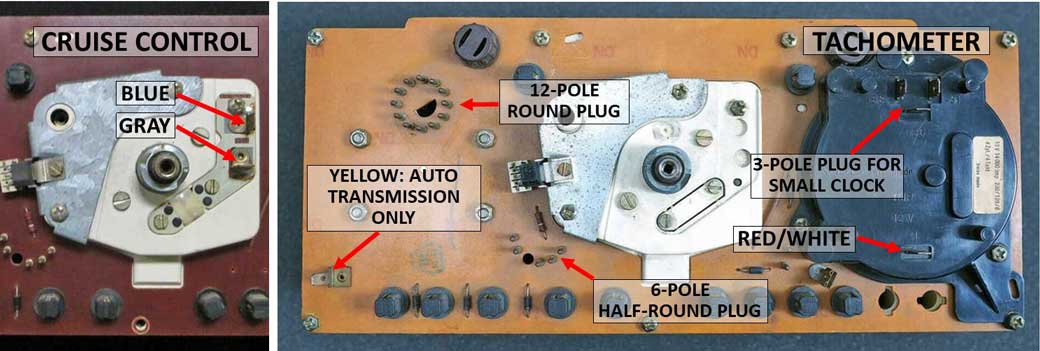
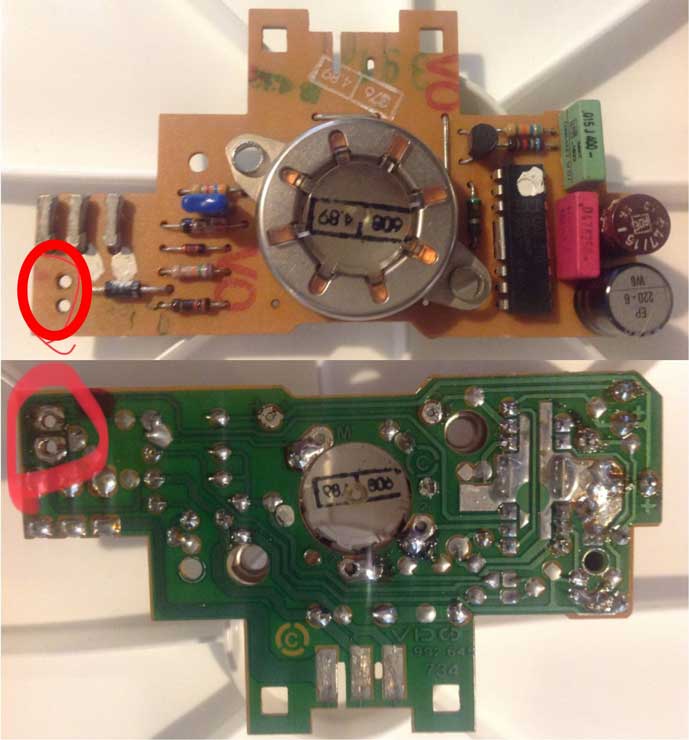
If you have CRUISE CONTROL, your speedometer will have this extra device on the back.
|
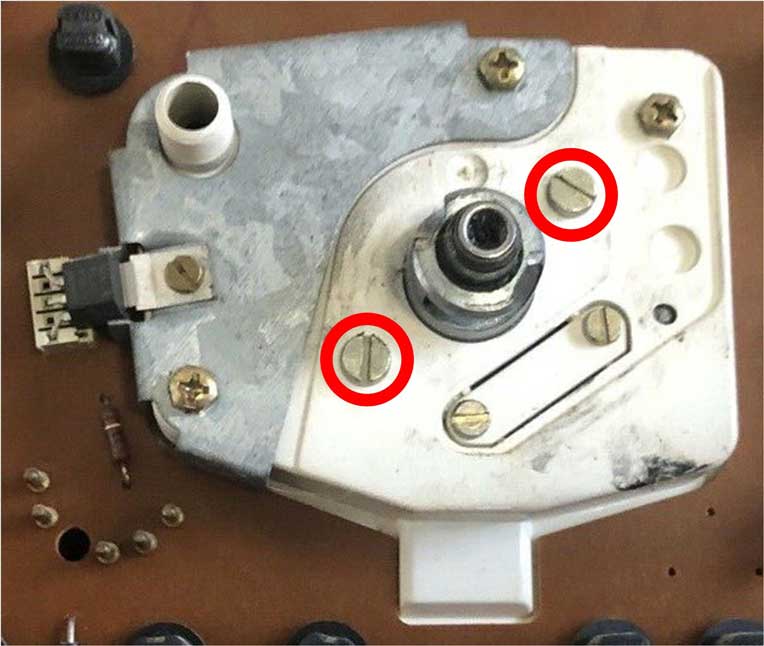
Remove these two
slotted screws
on the back of speedometer.
|
If you have CRUISE CONTROL, also remove these other two smaller slotted screws.
|
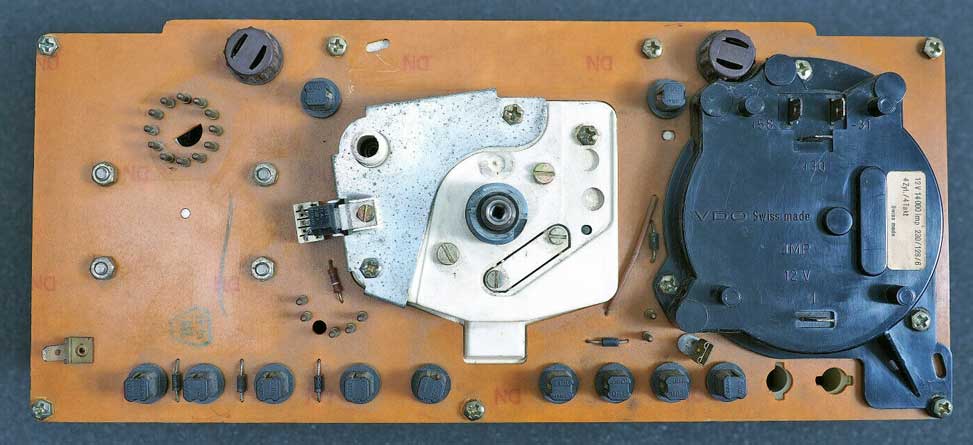
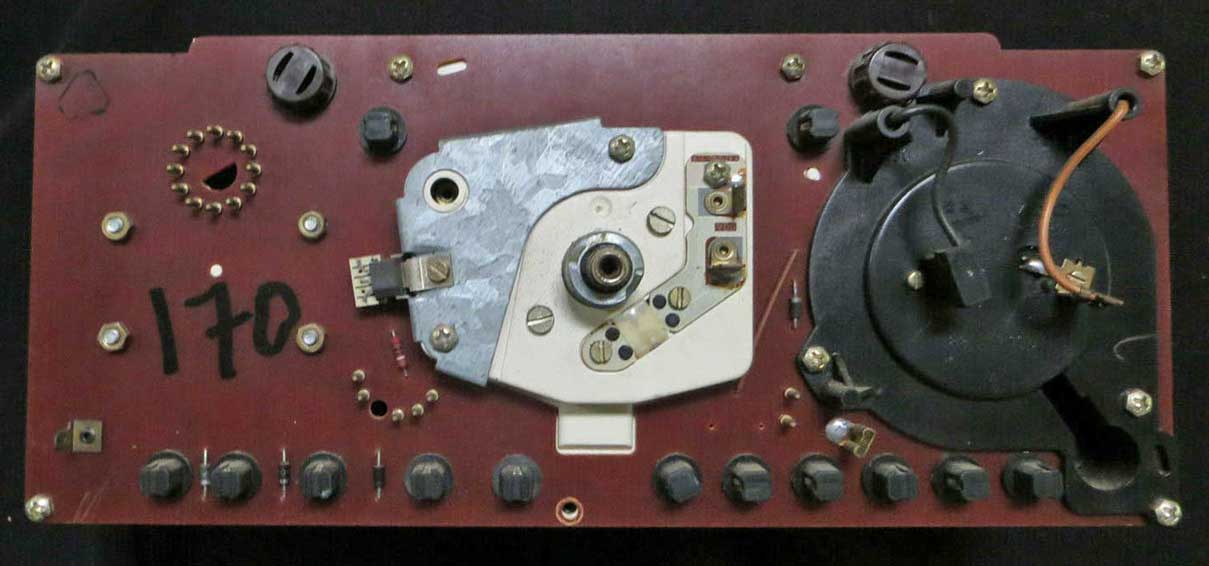
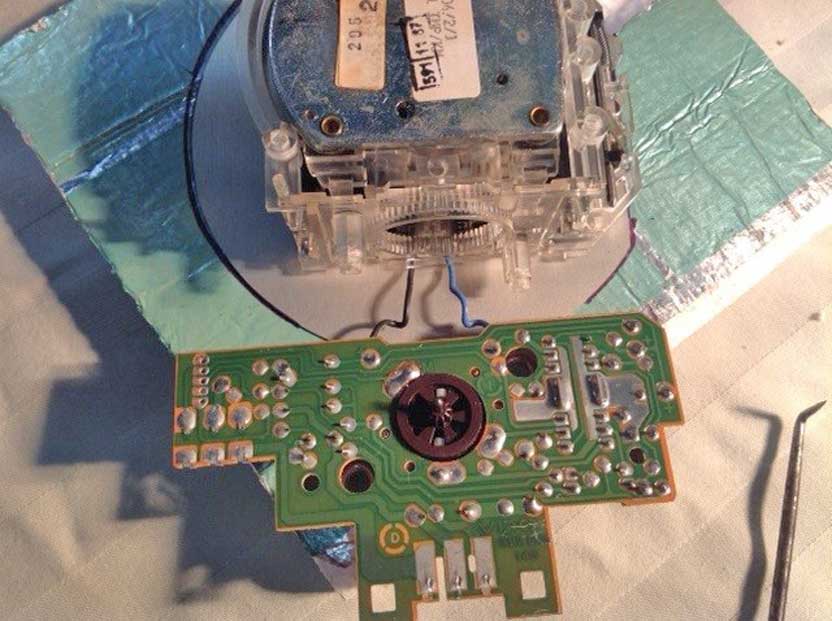
After all needed screws are out, next lift out the
circuit board from the back of instrument cluster
housing.
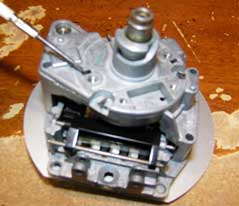
After lifting out the circuit
board, here's what you will now see BELOW. This is the speedometer still sitting in the housing.
Now carefully lift out the speedometer and have a look at it if you've never
seen one up close.
|
Once lifted
out, the odometer reset button can be removed and placed out of the
way. The end of the button can be popped off of that metal bar. The
plastic odo button can be fragile and can get broken, so be gentle with
it.
|
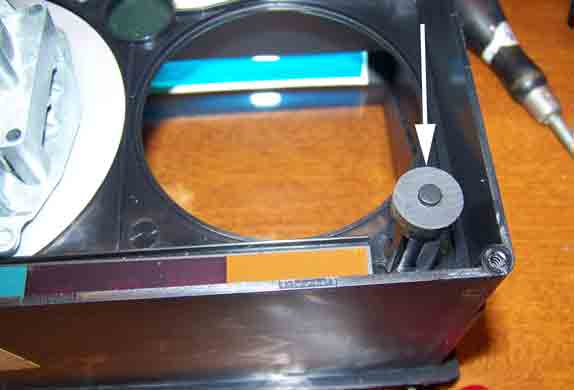
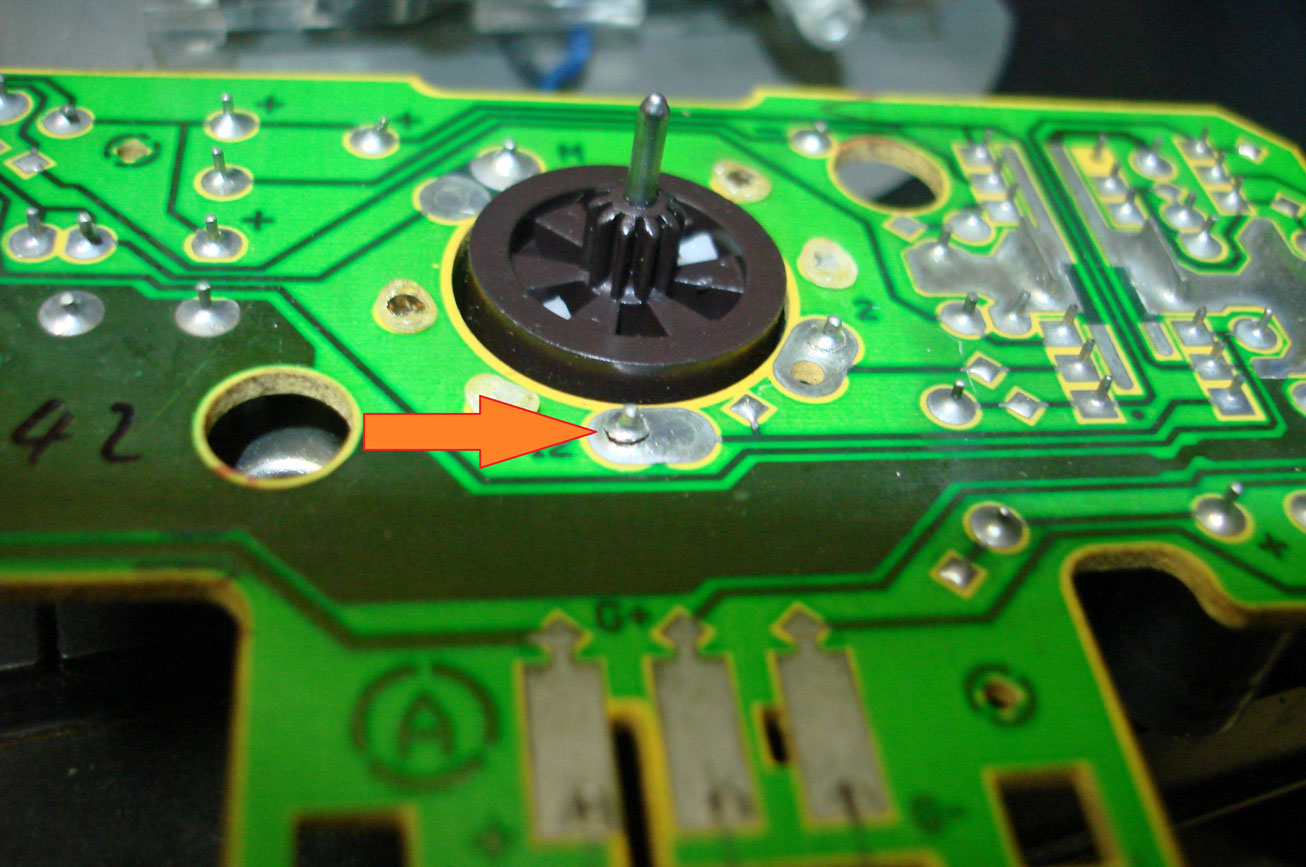
If your cluster has a
tachometer, you'll see this little item indicated by
the arrow below.
Don't lose it. It will fall out
if you turn the box over.
|
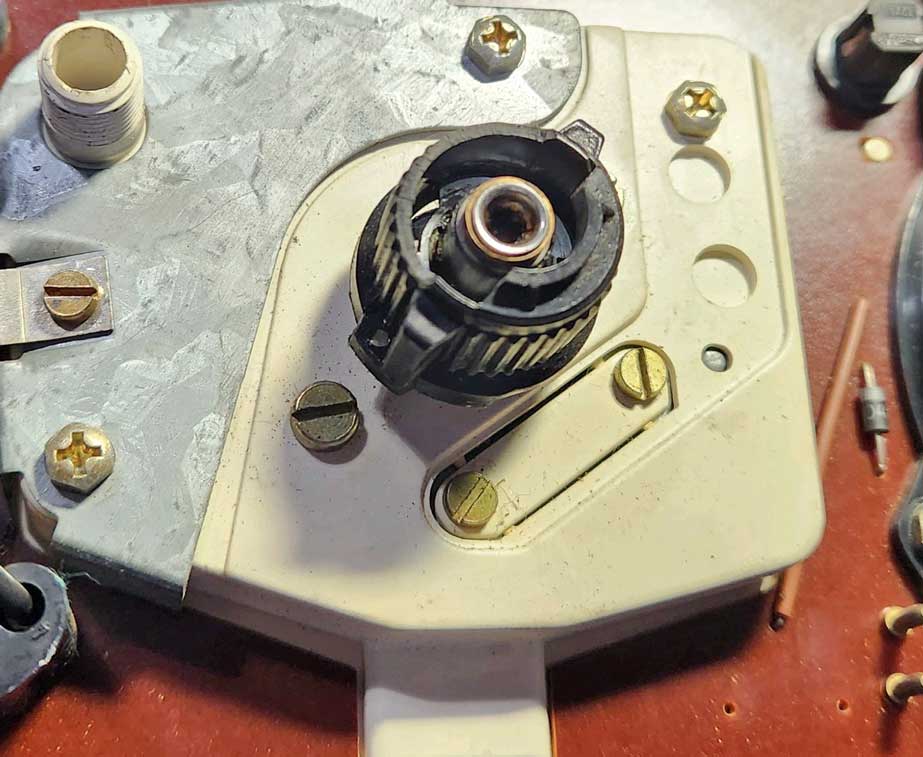
Speedometer Needle
Removal
(Locking the Speed Cup)
On the 1981-'85 240, the
speedometer needle needs to be removed. This is a
delicate operation.
Here is the back side of your speedo. Look for
two rectangular slotted holes. One on each side. One is indicated by the
screwdriver in this photo.
|
Insert a tool, such as a small slotted
screwdriver, into one of the
holes.
This will lock the speed cup and the mechanism inside the
speedometer will not be able to spin. This way the needle indicator shaft cannot turn.

|
|
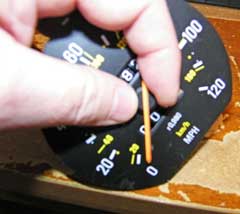
In the next step you'll be removing the needle, but
first you will be gently lifting the end of the needle up and over the
ZERO stop pin.
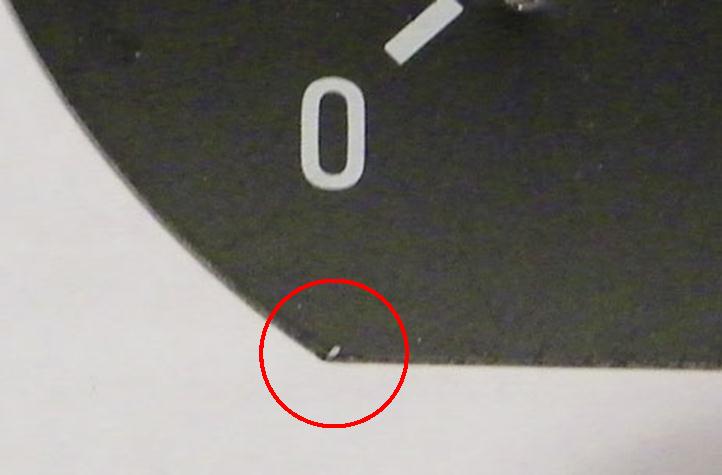
When you do that, you might take note of the little mark
shown in this photo. It's a resting position mark that the VDO factory
used when assembling this speedometer.
|
After you have gently lifted the needle
over the ZERO stop pin, release it and take note of its resting
position. It will likely be pointing at
the little mark in the above photo. When you reinstall the needle
later, you should use the same position. This way your speedo needle
will be in the same place as before after you're done.
NEEDLE REMOVAL:
To remove the needle, grip
the
center plastic hub of the speedo needle and turn the
needle counter-clockwise (turn the tip toward the "MPH" or km/h text).
Be careful to NOT
put PRESSURE on the thin orange plastic needle pointer. It can snap off in
a very unpleasant way if you do.
 The factory used a liquid glue (similar to Locktite)
to glue the needle hub onto the shaft. Since the internal mechanism inside
the speedometer
has already been locked by you, you may now begin turning the hub and forcing
it in a counter-clockwise direction
until you feel it come
loose and get easier to turn. You may feel the
glue break loose and "pop". Once that happens, it will be easy to turn
and you may then continue to turn
it further, while at the same time
gently pulling it toward you. It'll soon come off in
your hand without any fuss.
The factory used a liquid glue (similar to Locktite)
to glue the needle hub onto the shaft. Since the internal mechanism inside
the speedometer
has already been locked by you, you may now begin turning the hub and forcing
it in a counter-clockwise direction
until you feel it come
loose and get easier to turn. You may feel the
glue break loose and "pop". Once that happens, it will be easy to turn
and you may then continue to turn
it further, while at the same time
gently pulling it toward you. It'll soon come off in
your hand without any fuss.
|
Once the needle is off,
remove these 2 tiny
screws.
Be careful if they're
tight. The factory liked to put thread-locker compound on
them. These screws are soft metal (brass) and are easy
to damage. Find a small screwdriver that fits these
small slots well.

|
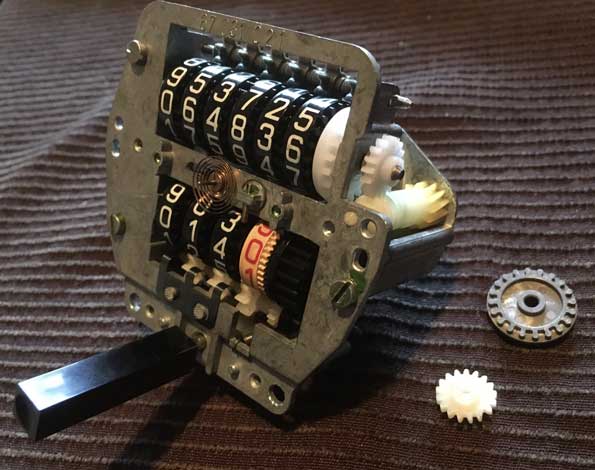
Here's the naked speedometer after removing the
face plate. 
See those 3 slotted
screws? Enlarge the pic and you can see
better. Remove them. They hold the two
halves of the speedo together.
Once the screws are
removed, be gentle when pulling it apart. The
parts inside are delicate, but it won't explode in a
shower of parts... trust me.
You'll see one piece
(below photo) that can fall out at this point. Not to
worry, just put it back like shown in the photo.
|
Here's the back half of the speedo BELOW.
The long white gear indicated by the
arrow is what I was talking about. It will fall out
easily. Just be sure to put it back before you
reassemble.

|
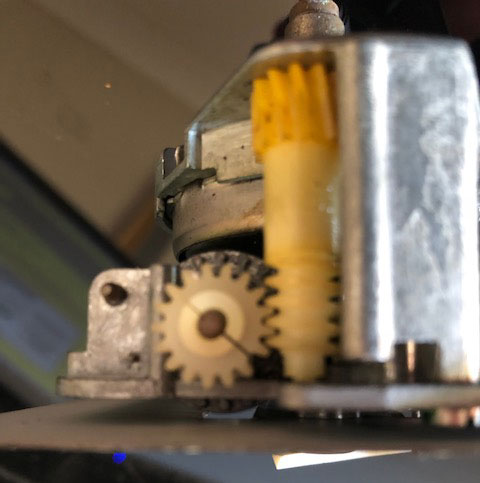
Here's the front half of the speedometer BELOW,
viewed from the back side.
See these two gears indicated by arrows? In this photo BELOW,
one gear is BLUE
and one is a BLACK. To avoid confusion, I'll
call these "outside gears"
since they're on the
outside of the odometer frame assembly. All
speedometers will have a gear like that blue gear, but not all
speedometers will have that black spiral gear. It's
only found in cars with
an interval engine service light in the dash cluster.

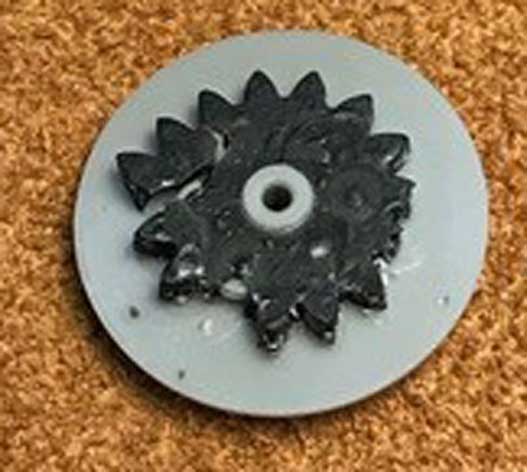
This BLUE gear (yours may be a
different color) is most often the culprit
for a failed cable odometer ( . . . . but not
always).
I
now offer replacements for this gear if you
need one. The outside gears I have for sale in this
section will replace this one. |
NOTE: You may notice in this
photo ABOVE the odometer reset button is missing from the
bottom of the speedometer. I removed it so it
wouldn't get in my way. It pops off quite easily. They
also tend to break after years of getting pushed and
pushed. Replacements can usually be found for
sale online, but I don't offer them.
|
NOTE: Here's something that's a
little different. This particular speedo is from a
1984 240 Turbo in Europe. When compared to the speedometer
shown above, this speedo only has ONE outside gear and no black spiral gear. It is because this car was not
equipped with an interval engine service light in the
dash. This outside gear looks to be yellow or
white in this photo and it has 11
teeth. So far I have heard of this 11
tooth gear only being found in Europe, Australia and Canada.

|
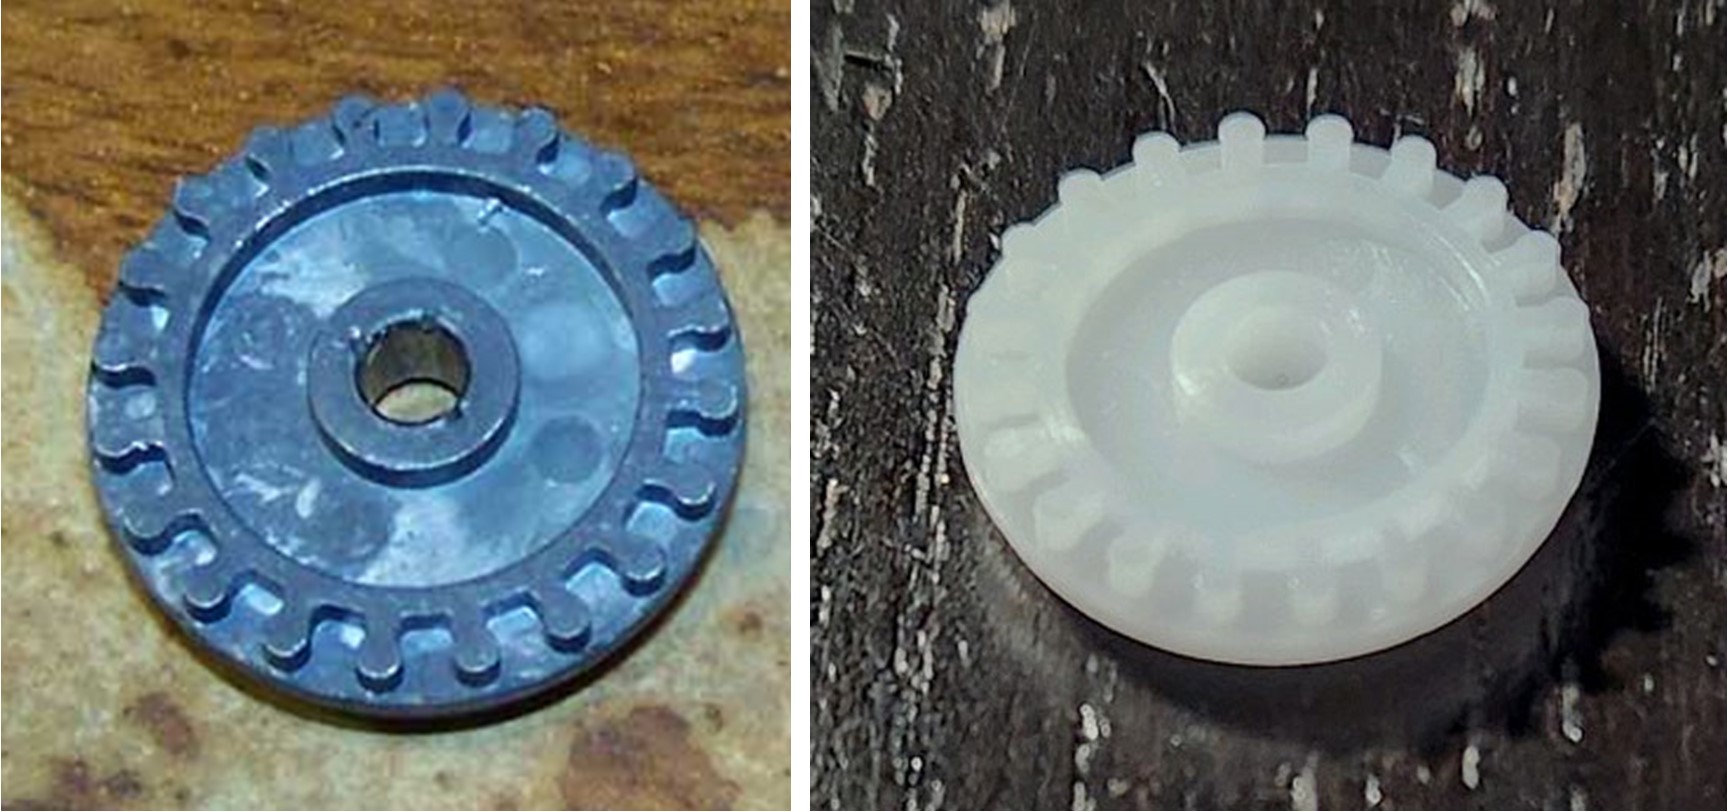
Here's another speedometer that is a bit
different. This
is a 1975 240 speedometer found in the U.K.
It has a 17 tooth gear that has split from age.
|
Here's a closer BELOW of that
BLUE GEAR shown above. Your gear may be a different color or a different tooth count.
This one has 14 teeth.

This gear is a very common failure point.
It can have a tendency to crack or become
stripped on the shaft. It might also lose
some teeth after years of use. There is a long
metal shaft going through both of these two outside
gears.
In order for the odometer to function correctly,
these gears need to grip the shaft... so slipping on the shaft is NOT allowed.
NOTE: When I was working
on MY speedometer, I found nothing obviously wrong
with either of these outside gears. There were no cracks
and no missing teeth. And they appeared to be
gripping the shaft from what I could see. This
was a mystery, since my odometer clearly was not
working.
So I gave up. It's not my fault
Volvo owners give up so easily.
|
NO! 240 owners DO NOT give up!
I hope you didn't
fall for that.
Instead, I found a way to test the odometer to see
where my problem was.
As I mentioned, that
blue gear could be cracked, missing teeth or just
plain slipping on the shaft, although I could find
no problem with that in MY speedo.

I needed to see for certain if my odo gear was
gripping or slipping on the shaft. To test
this, pick up the assembly like ABOVE and grip
the wide black inside gear (like I am in this
photo) so it can't turn. Now see
if you can turn the two outside gears on the end of
the shaft. Don't force them.... be
gentle. You should NOT be able to turn the two
outside gears without the wide black inside gear
turning also. If you can
spin the outer gears without
the inside gear turning, you know something
is slipping somewhere. MINE WAS SLIPPING SOMEWHERE. It's important
to find out exactly what is slipping before you pull
anything apart.
If you find the blue
(or whatever color) plastic outside gear is
slipping, your best solution is to replace
it. Some have been was successful in gluing them back together,
but that was before new replacements were
available.
If your outside
gears seem tight on the shaft as they should be (like mine were)
and you're still not sure what's wrong, then keep
reading . . . .
|
See this brass collar BELOW?
It's pressed onto the shaft (opposite end from those
outside gears). This shaft goes through the
odometer number wheels and through the two outside
gears on the other side. When you try to spin
the outside gears (while holding the wide black inside
gear steady), have a
look at this collar to see if it is spinning along with the gears.

If the shaft/collar is NOT spinning,
then one or both outside gears are loose (that is
bad).
If the shaft/collar
IS spinning and it
still appears the outside gears are gripping the
shaft, then something else is slipping.
Don't worry. I'll cover this situation a little
further below, so don't be a cheater and skip
ahead.
|
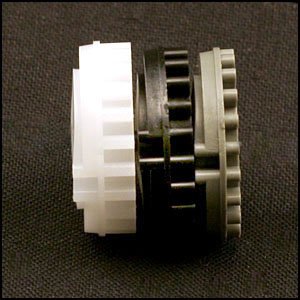
REMOVING THE
OUTSIDE GEARS: If you find you need
to remove the outside gears, gently pry them with a small flat
screwdriver. I don't know if it
matters, but for now pay
close attention to which direction they face,
so you can put them back on the same way.

|
For those of you who don't
read directions very well, here's a close up of
these gears.
NOTE: The tops of these gears in
the photo were facing away from the speedo
body. Maybe that will help those of you who
weren't paying attention to the positions of your
outside gears (assuming it matters).
 I found this blue gear to have 14
teeth and
it's pretty typical of most U.S. 1981-85 240 Turbos
like mine.
I found this blue gear to have 14
teeth and
it's pretty typical of most U.S. 1981-85 240 Turbos
like mine.
I offer new replacements for this
gear in several different tooth counts if you need
one. Please
scroll down to the bottom of this section.
If you need a
new gear, you should replace yours with the same tooth count to match.
If you found that
one or both of your outside gears were spinning on
the shaft, and the gear is not otherwise broken, you
could try roughing up the shaft with some sandpaper,
although I have not tried this and cannot say if it
will help. It's also possible to use a small
punch or screwdriver to tap small dents around the
gear center hole. This might help close up the
hole slightly. Be careful, since beating on
your old plastic gear may destroy it. You will have
to decide on the risk. Remember? You're
a decisive 240 owner! However, if a new gear
is available, I would stop screwing around and
just buy a new one.
|
HERE'S WHAT I FOUND THAT WAS DIFFERENT WITH MY
ODOMETER FAILURE:
When I tested my
outside gears to see if they were gripping or
spinning on the shaft, I found they were gripping
quite well, but they were spinning the shaft when I
turned them while I held the wide black inside gear
steady. That was not the way it needed to be.
As it turned out, my outside gears were just
fine. What I discovered was that the GRAY METAL GEAR you see in this photo BELOW
was slipping on the shaft. It's supposed to GRIP the
shaft. Slipping is bad.
Removing this gray metal
gear is a bit trickier. You can see there's a shaft going
through the gear.
Remember, this shaft goes through
all the odometer number wheels too? If you
remove this shaft, the odometer will explode and a
lot of little parts will fall out and bounce
everywhere. Not good.
|
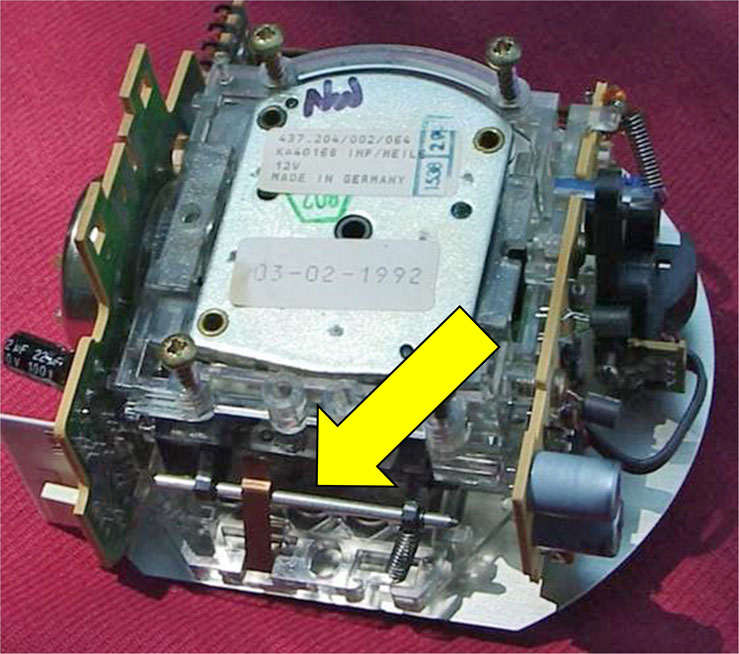
I found a way.
The shaft needs to be pulled out just enough to
release that metal gear. The last thing I
wanted to see was all those little number wheels
falling out and scattering on the floor, or even moving in the slightest
amount. So look closely at this photo. I placed a piece of packing
tape across
the number wheels to keep them snugly
together. No moving. Much, much better.

|
Then I used a felt marker and
marked both the gray metal gear and the thin white
plastic one next to it. When I replaced that gray
metal gear, I wanted it to go back in at the exact same position, just in case it made a
difference.

|
Here we go. First, remove those two outside gears. Pry them off the shaft. This was
discussed a few steps up.
|
Then, to slide the shaft out,
use a small screwdriver to pry under this brass
collar. The collar and shaft are pressed
together as one piece. Let them stay that way.
The shaft and collar should begin coming out slowly from the side shown here.

Work
slowly. DO NOT pry the shaft out too far at once.
Pry the shaft out
just enough so the gray metal gear is free.
Then carefully lift the gear out. Try not to
disturb the odometer number wheels.
|
Here's the original gray metal gear
after I removed it from my speedometer. This one is
1/8th inch thick (3.175 mm).
If you need a new one, a new gear is shown at right. New gears are made of plastic and are more durable.
Take note that this gear
may be found in three
different thicknesses: 1/8 inch (3.175 mm),
3/16 inch (4.76 mm), or 1/4 inch (6.35 mm).
The most
common one so far in nearly ALL speedometers is this 1/8 inch
gear. This original gear is made of
metal, with the appearance of "lead," so it's
commonly called a "lead gear." If you look
very closely, the hole in the center has some very
faint splines. ON MY GEAR these splines were
worn down smooth, so this caused it to slip on the
shaft.
My first solution was to
tighten up this original metal gear on the shaft. I used a
pointed tool (a nail punch or small screwdriver would
work) and I gave the area around the hole a few taps
to slightly deform or expand the metal and tighten
the grip on the shaft. Three taps on mine
worked. The gear went back on and was nice and
tight, but after a while it began slipping again.
Since a new plastic replacement gear was available, I
went back in and replaced it with a new one.
These gears are available
below if needed.
Please
scroll down to the bottom of this section.
|
After you re-insert the gray
metal gear, push the shaft back through and test the
odometer function again before installing the outside gears. This way you can be sure that metal gear is gripping the shaft BEFORE final reassembly.
Pay attention to the alignment of the TOP
odometer numbers. The first time I re-installed the
gray metal gear, I found the far right number wheel
was no longer aligned (see
above photo).
This means I allowed that number wheel to slip a
little.
I pulled the shaft
back out again and realigned that odometer
wheel. Now I have a perfect odometer
again.
|
Here's something NEW
I discovered later while repairing one of my 240s.
This may come up on your car some day.
After re-tightening these three screws (shown by white
arrows) and after placing the speedo needle back on,
I found that the speed cup mechanism was somehow
binding or jamming inside when I would spin the rear cable collar with my fingers. This jamming would only occur when these
three screws were all tight. I found that if I loosened these
screws slightly, the needle and shaft would rotate
nicely with no binding. So it appears it is
possible to over-tighten things and make the
mechanism bind.
This is
probably a rare occurrence, but just keep it in mind.
I didn't think it would be a good idea to run it
with loose screws, so my solution was 3
very, very thin washers placed between the two
halves. Then I could tighten the three screws and it
all worked perfectly. Another solution could have been to
use some thread-lock
compound on the threads and then NOT tighten them down very much.
|
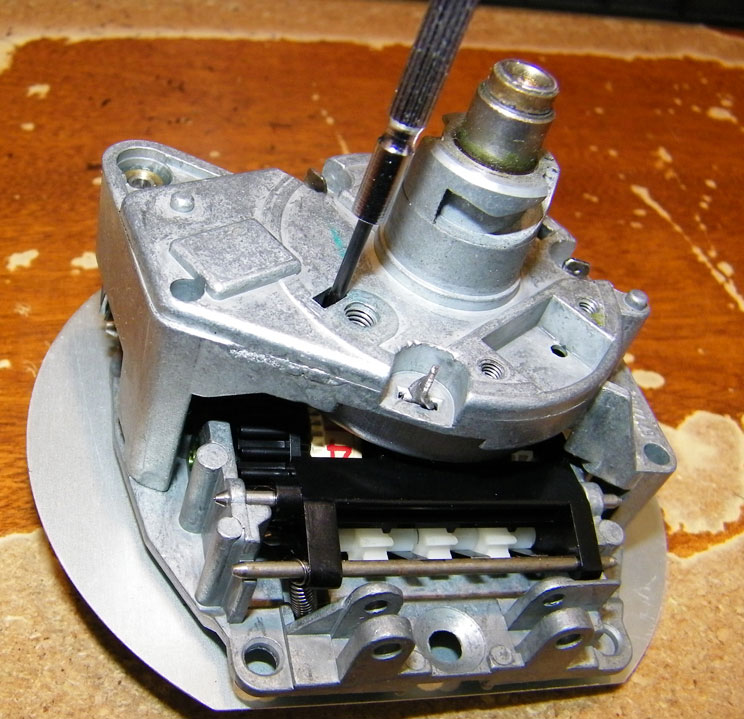
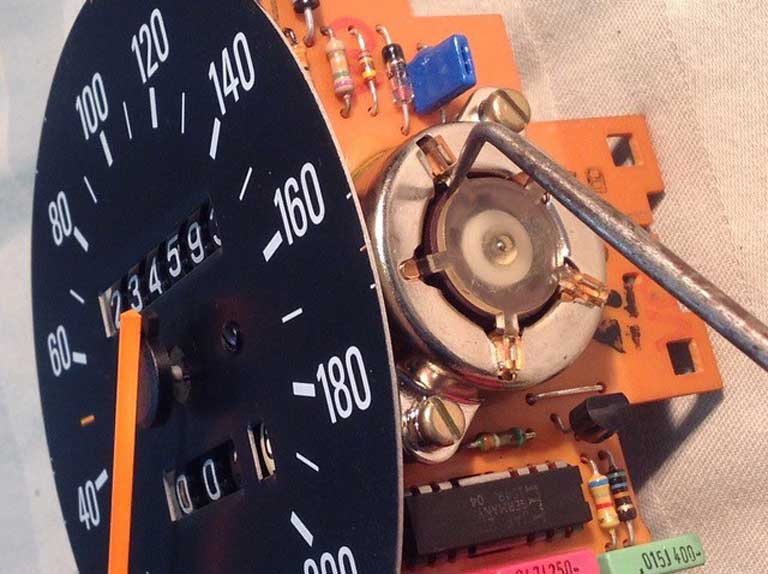
Now re-install the face and speedo needle.

NEEDLE INSTALLATION POSITION:
When re-installing the speedo
needle, make sure you gently push down evenly on the
center hub of the needle. Once it is on firmly
enough, if adjustment is needed, you may adjust it
to its former position by using the small
screwdriver trick to lock the speed cup as discussed
earlier.
If you forgot
to check its former position, you should know that
most mechanical speedometer faces will have a small
mark on the edge, just below the ZERO. Point
the needle at that mark if you can see it. That will be where the
speedometer factory set the position.
|
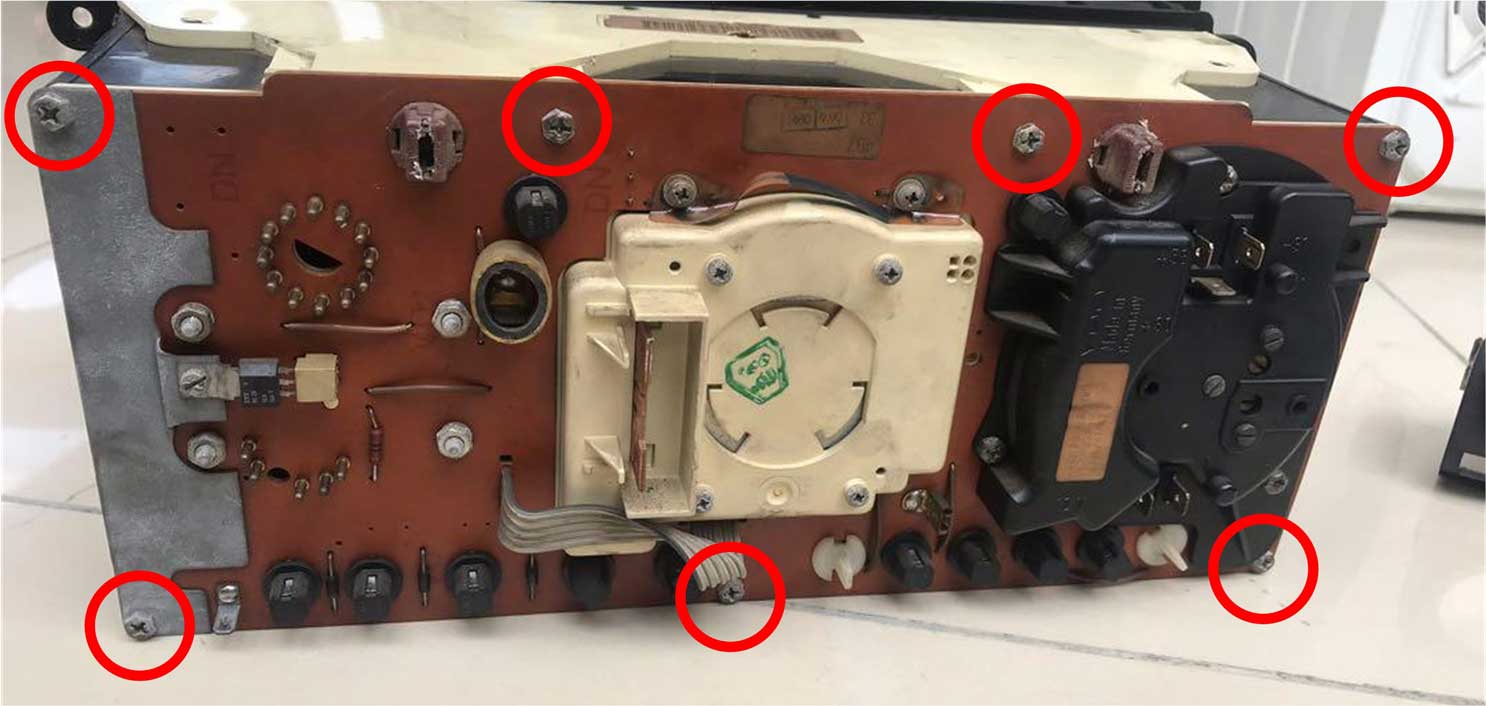
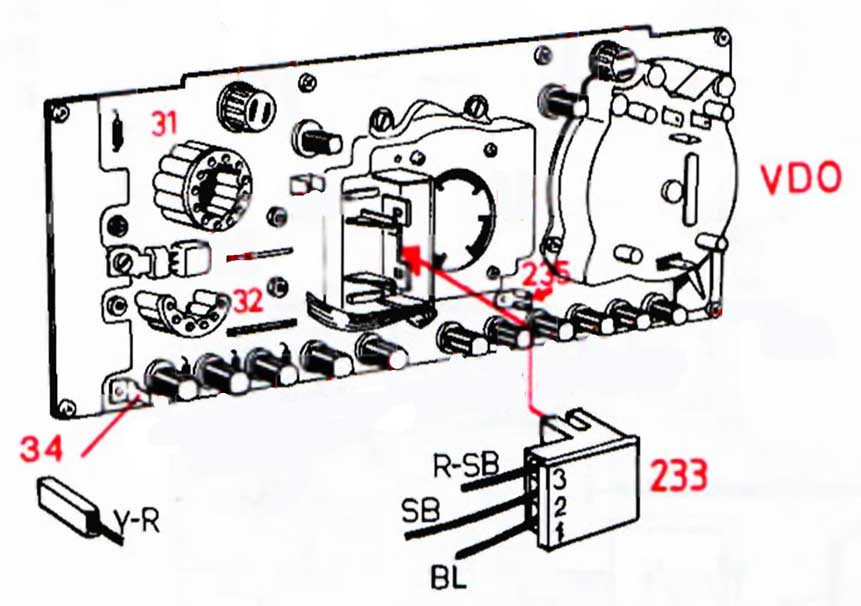
WIRING
When re-installing your instrument cluster, the wire connections needed are shown below.
The YELLOW wire is for auto transmission cars only. It connects to the OD OFF lamp on the front far right side.
If you have a LARGE CLOCK, there are no connections to make for that. If
you have the large CLOCK and see a Red/White wire, ignore it until you
decide to retrofit a tachometer.
| The total installation
time after removing the instrument cluster from the car will normally be less than an hour. |
|


 alternators are known for poor voltage.")


